Jay Blanchard, LLC
Website & Web Application Development & Design
Putting It All Together: HTML, JavaScript, PHP and MySQL
August 2015
- Required: a webserver running PHP and a database of your choice. MySQL is used in all of the examples. If you use another database you will need to change the connection string and perhaps update queries accordingly.
- Nice to know: PHP basics, SQL basics, jQuery basics.
- Download: Project Files
- Recommended Reading
Now that we've gotten some PHP, JavaScript and MySQL under our belts it's time to put everything together to show how we can use AJAX to call a PHP script which runs some MySQL queries, returning data to PHP and subsequently to the web page via the AJAX response. We will be re-using some code from previous posts while modifying and adding code to the project to enhance things. Don't worry though, all of the code is packaged up for download at the top of the article.
Typing is a good thing!
Even though the download code is complete, I encourage you to type some or all of the code into your own development environment. It will help you to retain the concepts and syntax needed for coding on a regular basis.
Since the process consists of many small steps, we'll work through them in order. This will help you to follow the data as it is created, submitted and then returned to us. To know what data we'll be working with, we'll need to create a basic users table in our database first.
                DROP TABLE IF EXISTS `users`;

                CREATE TABLE `users` (
                  `id` bigint(20) unsigned NOT NULL AUTO_INCREMENT,
                  `fname` varchar(32) DEFAULT NULL,
                  `lname` varchar(64) DEFAULT NULL,
                  `uname` varchar(64) DEFAULT NULL,
                  `password` text DEFAULT NULL,
                  PRIMARY KEY (`id`),
                  UNIQUE (`uname`)
                ) ENGINE=MyISAM DEFAULT CHARSET=latin1;
Next we'll create the HTML for some very simple forms.
<!DOCTYPE html>
<html>
<head>
Register / Login
</head>
<body>
<script type="text/javascript" src="inc/jquery/jquery-1.11.2.min.js">
<script type="text/javascript" src="inc/jquery/functions.js">
</body>
</html>
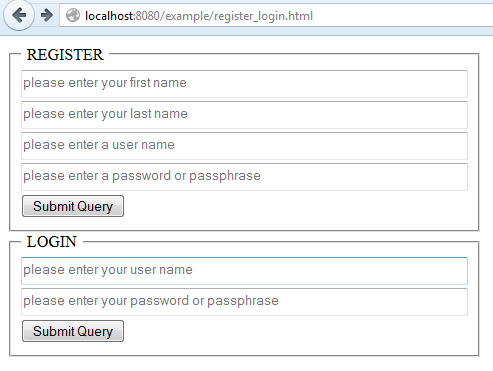
There is an empty div container. It'll be used for receiving information from the AJAX requests. Links for the jQuery library as well as the file containing the jQuery scripts we'll be creating have been added to the markup. The result is two very plain forms.

There is a surprising lack of JavaScript in the HTML file, isn't there? That's because we're going to add the JavaScript / jQuery unobtrusively. If we were to set up the PHP for processing the form data it would work in the absence of any JavaScript code.
Deja Vu?
You may have already completed some of the table creation, PHP processing code and markup if you have followed previous articles. If you have, that's awesome! You don't need to do these steps again. You will want to check for changes though, as a couple of things have been added to the markup and a check of the $_POST array has been modified in the PHP files.The PHP for each form is incredibly simple. The registration form takes advantage of the security provided by PHP's built-in password function password_hash(). The login form uses PHP's password_verify(), keeping the code small and tidy.
                include 'pdo_connect.php';

                if(!empty($_POST)) {
                    $fname = $_POST['fname'];
                    $lname = $_POST['lname'];
                    $uname = $_POST['uname'];
                    $upassword = password_hash($_POST['upassword'], PASSWORD_DEFAULT);

                    $query = 'INSERT INTO `users` (`fname`, `lname`, `uname`, `password`) VALUES (?,?,?,?)';
                    $params = array($fname, $lname, $uname, $upassword);
                    $results = dataQuery($query, $params);

                    echo 1 == $results ? 'Thanks for registering, ' . $fname : 'There has been a problem processing your request, please try again later.';
                }
                include 'pdo_connect.php';

                if(!empty($_POST)) {
                    $query = "SELECT `password` FROM `users` WHERE `uname` = ?";
                    $params = array($_POST['uname']);
                    $results = dataQuery($query, $params);
                }

                $hash = $results[0]['password']; // first and only row if username exists;

                echo password_verify($_POST['upassword'], $hash) ? 'You are logged in.' : 'We are unable to log you in.';
Each function is stored in its own file at this point. Code organization may dictate that we combine like functions into a single file, but for now it will be easier to work with the individual scripts.
Caution!
There are many libraries written for taking care of security properly and many frameworks which include these libraries. This article is intended to teach you how to use specific PHP functions correctly but does not take into account all of the issues surrounding password and website security. Should you decide to use this code in a production environment proceed with caution.
If you've setup everything correctly both forms will work as designed; each requesting the proper action and each either adding to or checking the database. Both PHP scripts return meaningful information about the status of the user and will provide errors (true error handling is beyond the scope of this post) when something wrong occurs. We will use the same information to provide updates to the user when we make the requests via AJAX.
Adding the AJAXIn the article The Basics of jQuery AJAX we only used what we needed to make the AJAX provide results without any concern for checking errors. We also hard-coded some items in the function. Now we're going travel a little more deeply into the return functions and make the request function generic enough to be used with any form, thus learning how to use jQuery's AJAX in ways that raise the bar in our applications.
Here is the complete jQuery function, with comments:
                $('form').submit(function(event){
                    event.preventDefault();
                    // gather the form data
                    var formName = $(this).attr('name');
                    var formData = $(this).serialize();
                    var formMethod = $(this).attr('method');
                    var processingScript = $(this).attr('action');

                    // perform the AJAX request
                    var request = $.ajax({
                        url: processingScript,
                        method: formMethod,
                        data: formData,
                        dataType: "html"
                    });

                    // handle the responses
                    request.done(function(data) {
                        // update the user
                        $('#response').html(data);
                    })
                    request.fail(function(jqXHR, textStatus) {
                        console.log(textStatus);
                    })
                    request.always(function(data) {
                        // clear the form
                        $('form[name="' + formName + '"]').trigger('reset');
                    });
                });
After we have captured the submit event and prevented its default action (wanting the jQuery to handle the submission of the data) we gather information about the form and the information put into the form. Having these bits of data will allow us to set up a generic AJAX request. We don't need to create separate functions for each form we create. That is pretty simple.
It gets more complicated handling the response in the callbacks for the AJAX method. We hard-coded (I know, I promised I wouldn't. I did it for expediancy. I'll give you a trick for getting around this later.) the element where a "good" response will go. If the request fails we output the failure to the console for now; we would likely log this in production and give the user a message.
Finally we use the .always() method to run a function to clear the form. In the example I am just doing this to show you how you can set up methods which will run whether the AJAX request fails or succeeds. It is a handy feature to have.
No Hard-coding!
This is just an idea to get your thought juices flowing, but what if you added a custom data attribute to your form, data-response="#element_id"? Each form could have its own element where the AJAX results would be displayed (or not, depending on the usage) and you would never have to touch your AJAX code. You could even specify the data type for AJAX response in a custom data attribute. Now you've got a piece of code that you can use over and over again in your projects!
Just as we did before in the The Basics of jQuery AJAX, open the browser's console window when you load the forms. This will allow you to see and correct errors quickly.
I registered a guy named "Fred" for the site. With everything working correctly I received a response just below the forms:

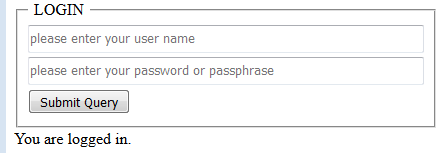
The response was returned from the PHP function to the web page via the AJAX request.done() function. If we log Fred in properly , we'd get the confirmation message:

You'll also note the form has been cleared each time you have clicked a submit button, handled effectively by the request.always() callback. If there was any sort of failure the request.fail() should be used to log the issue in such a way that you would get meaningful information to help you troubleshoot and fix any problems.
Between the previously mentioned articles and this post you should have enough tools in your toolbox to begin creating some truly interactive websites. Here are some key points you should take away:
- Create your markup the your back end scripting first. Ensure that these things work properly before going any further.
- Use exisitng markup information when adding your JavaScript / jQuery functions. Avoid in-line JavaScript.
- Keep the browser's console window open while you're developing JavaScript / jQuery functions. It's your first line of defense for solving problems.
- Understanding processes you repeat over and over again allows you to create re-usable functions and modular code easily.
Happy coding!
Comments? Give me a shout on Twiiter: @jaylblanchard