Model building
A Labor of a Long Lasting Love...Love Bug That Is
The spring of '69....
Sounds like the beginning of several love stories, doesn't it?
For a 10-year-old boy, the love involved a car.
Discovery
As a matter of habit, we faithfully watched Disney's Wonderful World of Color every Sunday night. Truth be told, it was early times for the mystique of Disney and all that was coming to be. Between the Daniel Boone episodes and stories about things to be built at the parks, we learned about the people putting the whole thing together. Imagineering was the word Disney used to describe its engineers, and that thought burrowed deeply into my psyche. Dad had mentioned it before. To me, it was every bit as important as being an astronaut.
Ten-year-olds, right?
More often than not, we'd also see the short trailers for upcoming Disney movies, and sometime late in '68 we saw a car with a mind of its own...Herbie the Love Bug.
Not that there hadn't been other important self-aware cars (My Mother the Car) or fantastic superhero rides (Batmobile, Black Beauty). But Herbie struck a nerve.
The Movie
The movie was released in March of 1969 and Disney, marketing geniuses that they are, managed to feature Volkswagen Beetles in Herbie livery sitting out front of theaters across the country. Ten-year-old me tried to get that car to acknowledge my presence right after the matinee, because I didn't know anything about marketing (outside of Saturday morning cartoons) and I thought that somehow, Herbie was real.
I also got to see the car again at another movie theater near my grandparents. Again, 10-year-old boy, one car, no knowledge of marketing.
"How did Herbie get from Natchez to Houma?"
The Kit
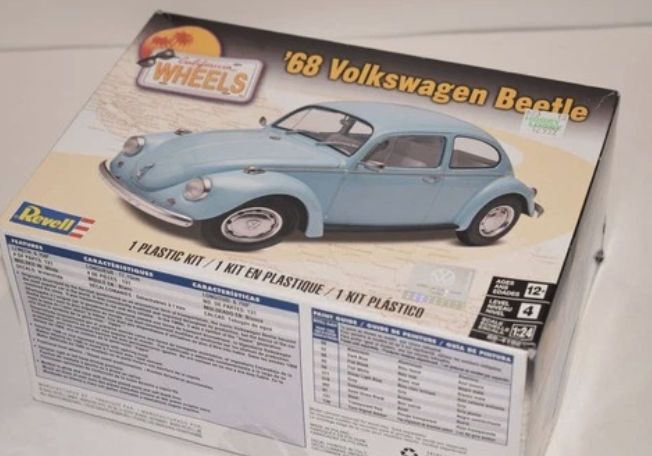
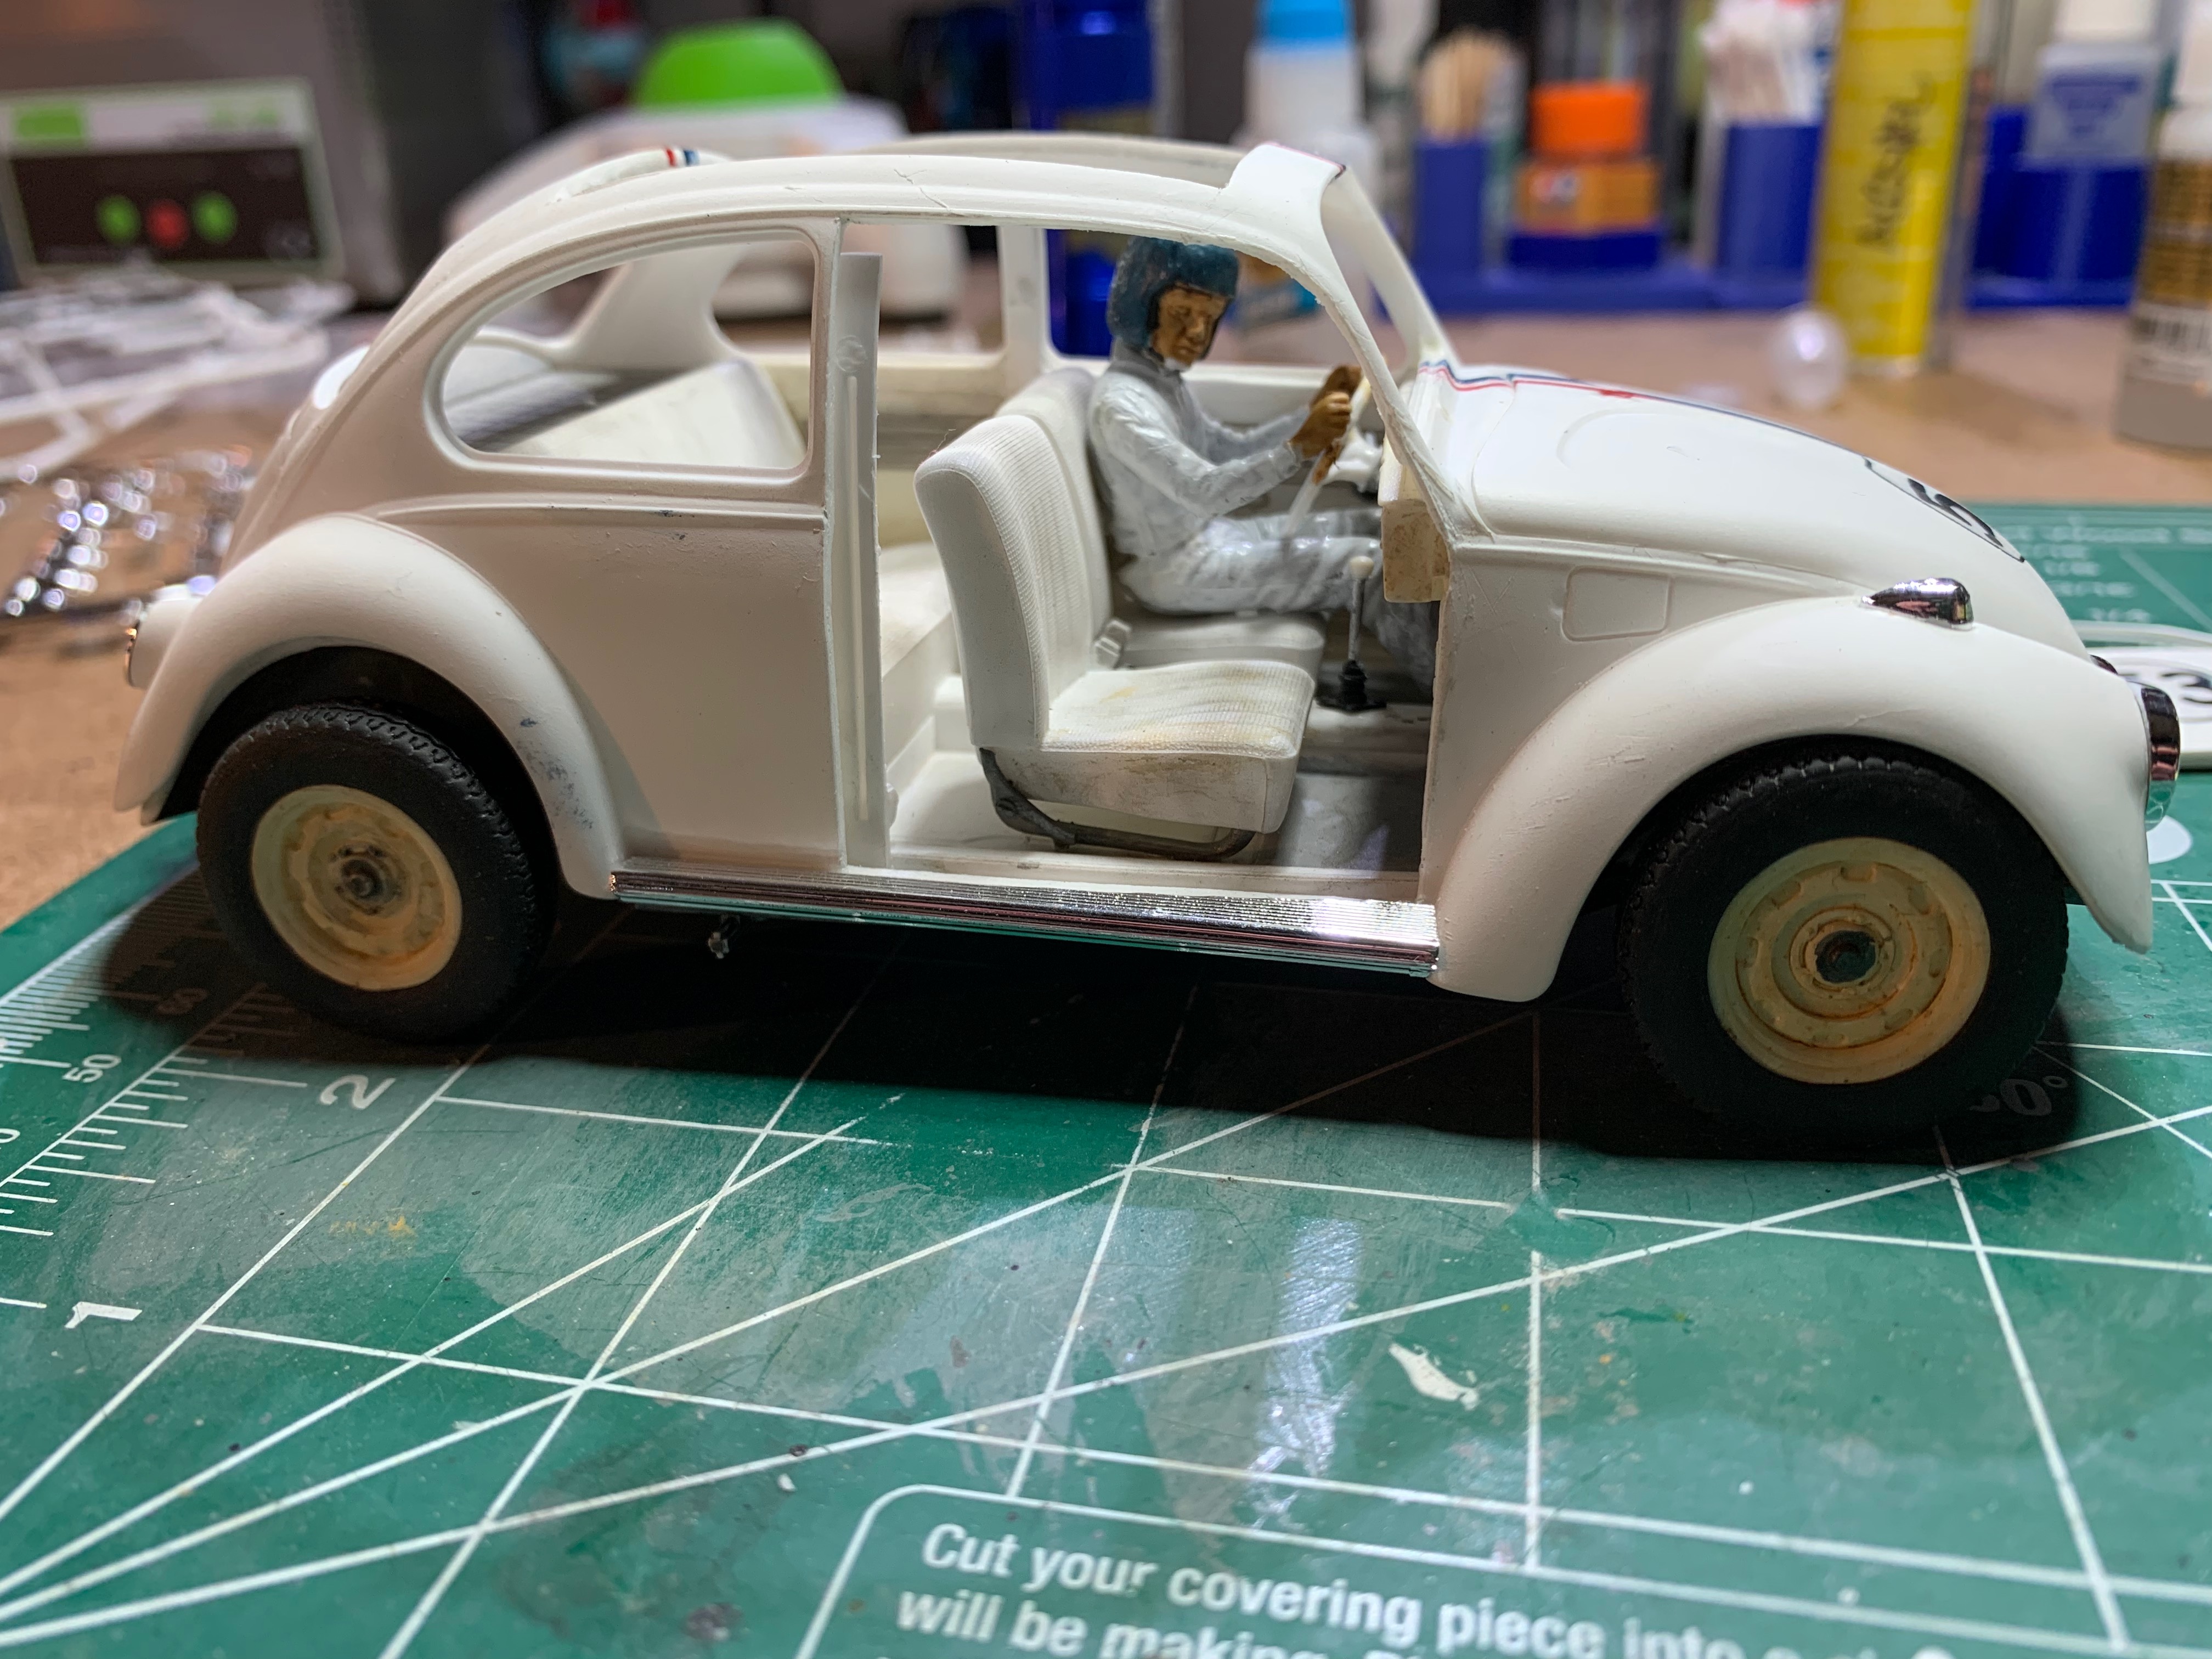
Then came the Revell model kit.
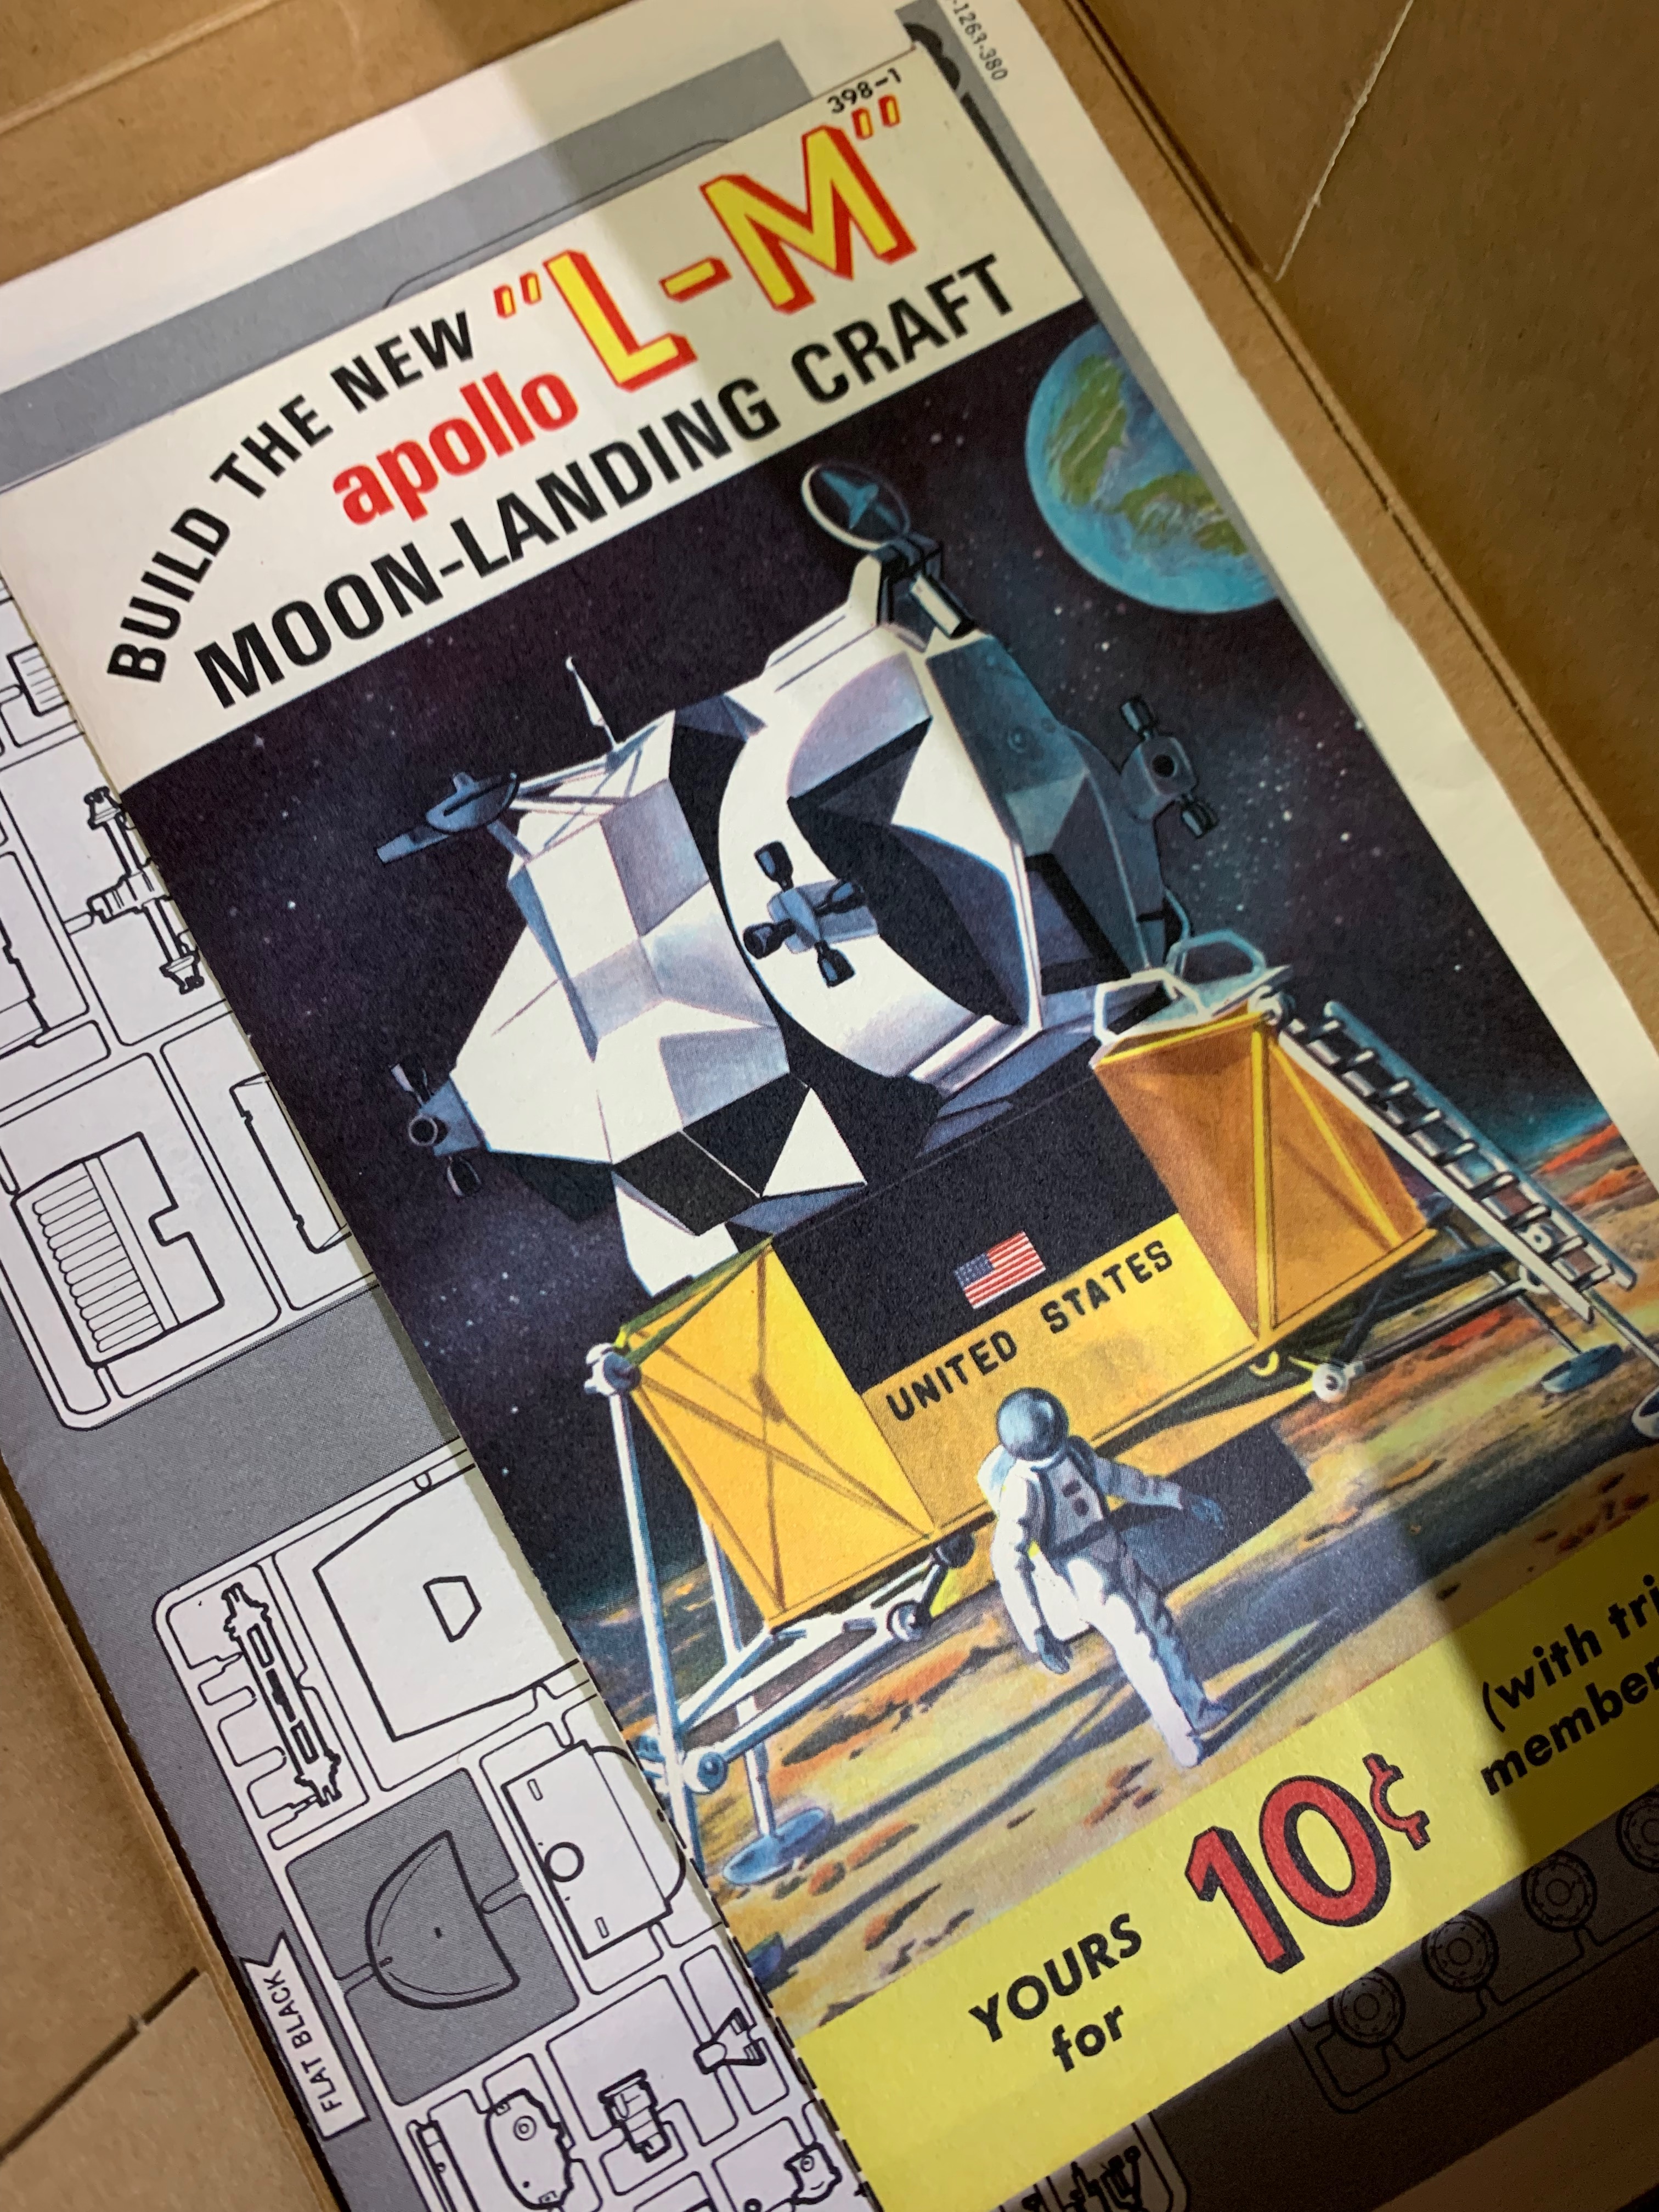
If my recollection is correct, the kit was in my Easter basket and, while I had to get through the church service, lunch, the Easter egg hunt, and visiting relatives for the holiday, the kit weighed heavily on me. I had to wait until that night to open the kit and then wait again until the next Friday night (we had to travel back home and school nights were right out where model building was concerned) to pour all of the sprues out, examine the decals (2 seconds), clear my desk, and get started.
I had only been building (let's say gluing, painting, and decaling for transparency's sake) model kits for a couple of years. I wasn't terribly skilled or patient. I was prone to getting glue on clear parts, decals not quite lined up, and inconsistent paint slathered on.
By 10 PM that Friday night, Herbie was assembled, painted (Testor's enamels, remember the smell?), decaled, and sitting on my desk—a thing of beauty, and I was a happy camper.
Lost to History, Kinda'
My friends and I were not beyond using model airplanes, tanks, and other kits to create fantastically creative stories in the backyard that ultimately ended with firecrackers and smoke bombs being planted, with the fate of the kits sealed in the hands of fire and flame.
I don't remember for sure what happened to Herbie—maybe my mind is blocking out the experience. I do know that once we moved away from Natchez, there were no "assembled" (ahem) kits in my new bedroom.
A couple more Herbie movies came out, and like many sequels, they were fun but not exactly the same. As I grew into a teen, thoughts of Herbie faded as all good memories do.
The Rise of Cable TV, Video Rental Stores & Auction Websites
Years later, cable television settled into nearly all of our living rooms and Disney was right there with their own channel. Somewhere, probably late one night, Herbie returned to the screen and, despite the obvious dating, held me captive for all of its nearly two hours (two hours??? Ten-year-old me thought it was considerably shorter, but I digress. Again.).
It was also around this same time that video rental stores were starting to dot the landscape....and you could even rent the player.
So, I did.
There were some other failed attempts to resurrect the love of Herbie by Disney. They couldn't capture the magic of the original.
And then, outside of the 'Pez Dispenser Myth,' eBay was born. Many model builders, just like me, went searching for kits we'd built as kids. I had a list in my head, things like the Renwal Thomas Jefferson submarine, the see-through Huey helicopter, some of the Tom Daniel radical cars, but at the top sat Herbie.
Time Rolls On - Rather Quickly
And then, with the appropriate heavenly choir and light shining from above, the stars aligned, and having started building again...there was the Revell kit for a "reasonable" price in reasonable condition, so I bought it.
Then promptly stored it in my stash with other model kits and supplies I had accumulated over several years.
There were other kits available:
Revell released a Herbie Rides Again kit in 1974. I missed that one entirely. I was fifteen. Apparently I had other things on my mind.
Somewhere along the way Polar Lights released a new Herbie kit. It was a snap-together kit and, while perfectly respectable, it wasn't my Herbie kit. By then I'd already found the Revell kit I'd been looking for. As I recall, that kit suffered from some inaccuracies that made me turn up my nose.
The Problem Staring Me In The Eye
I finally owned the kit I'd wanted back for decades—and now I couldn't bring myself to cut it apart.
Model kits are meant to be built—that is their story. If they aren't built (we know that collecting model kits is its own hobby, and I am writing more about that in a separate piece), then they never get to reveal their true selves. I know that sounds all hokey, but many modelers have expressed the same to me in conversations over the years.
But there is that nagging thing of value. It's quite blurry, especially given the price of new kits today. I have a couple of these in my stash, including the aforementioned Huey. These are "holy grail" kits, and most of us cannot afford to buy one to collect and buy one to build—if we can even find more than one of the kit.
Unless....
Telling Herbie's Story
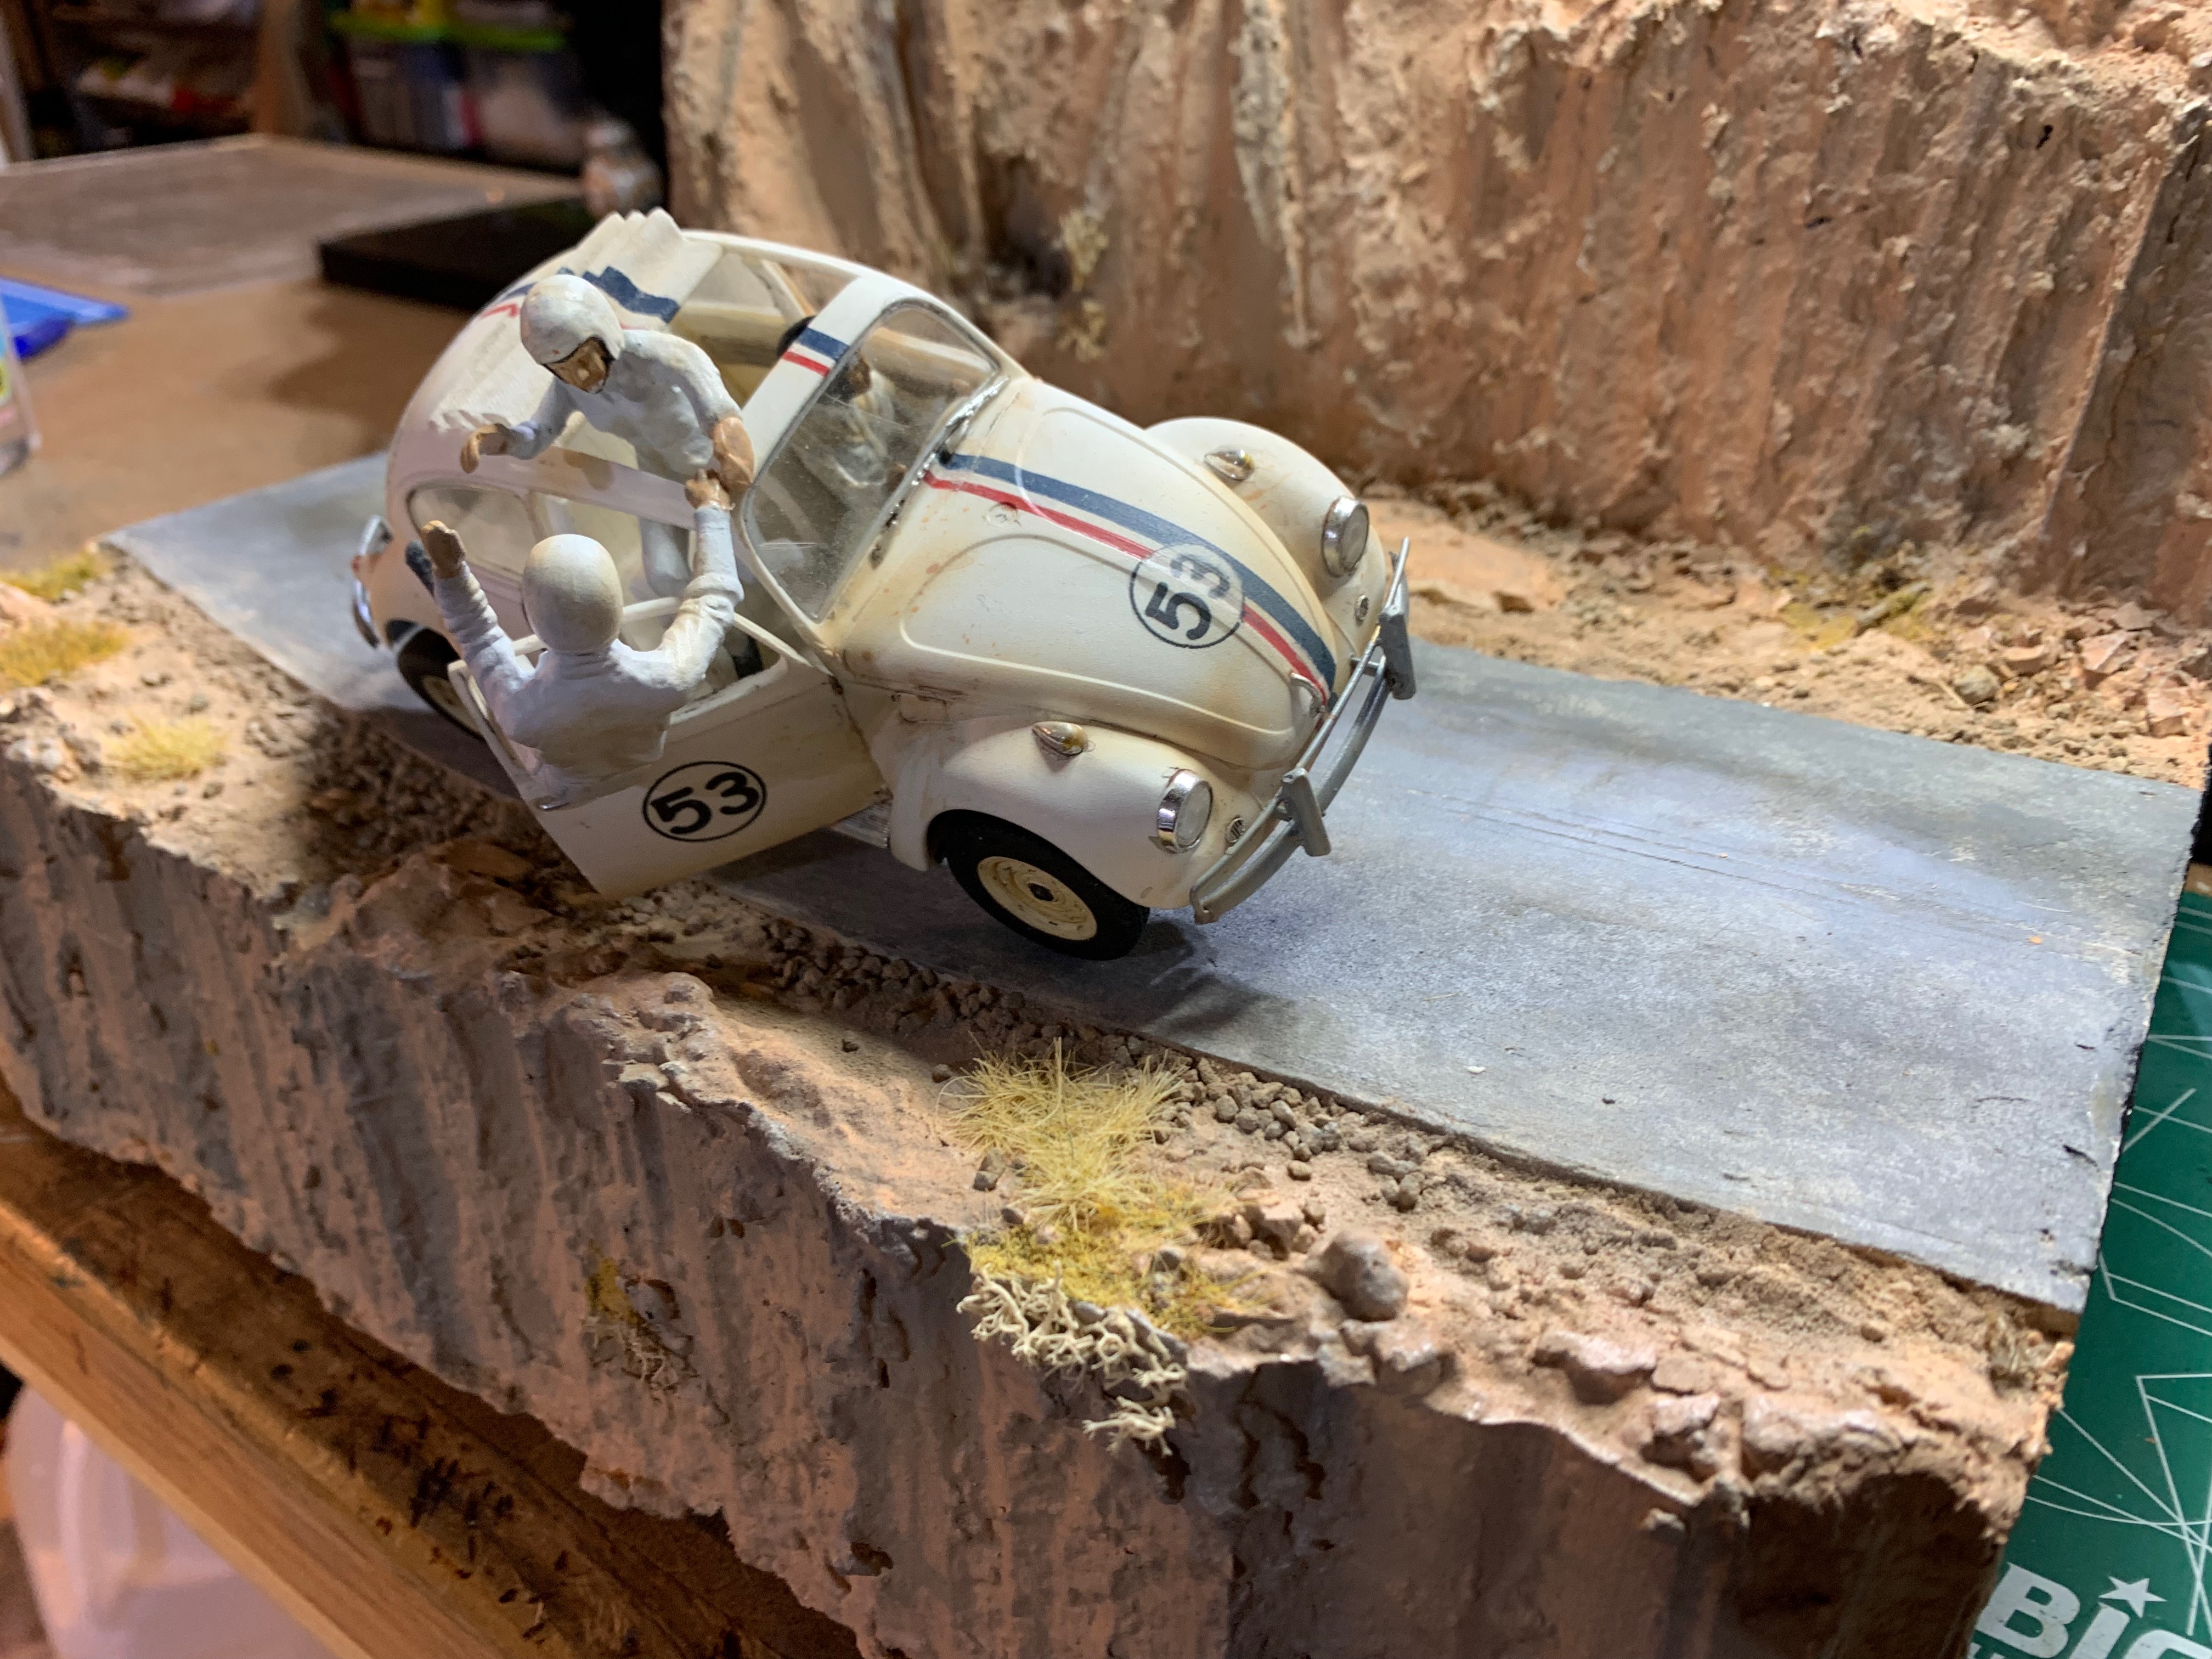
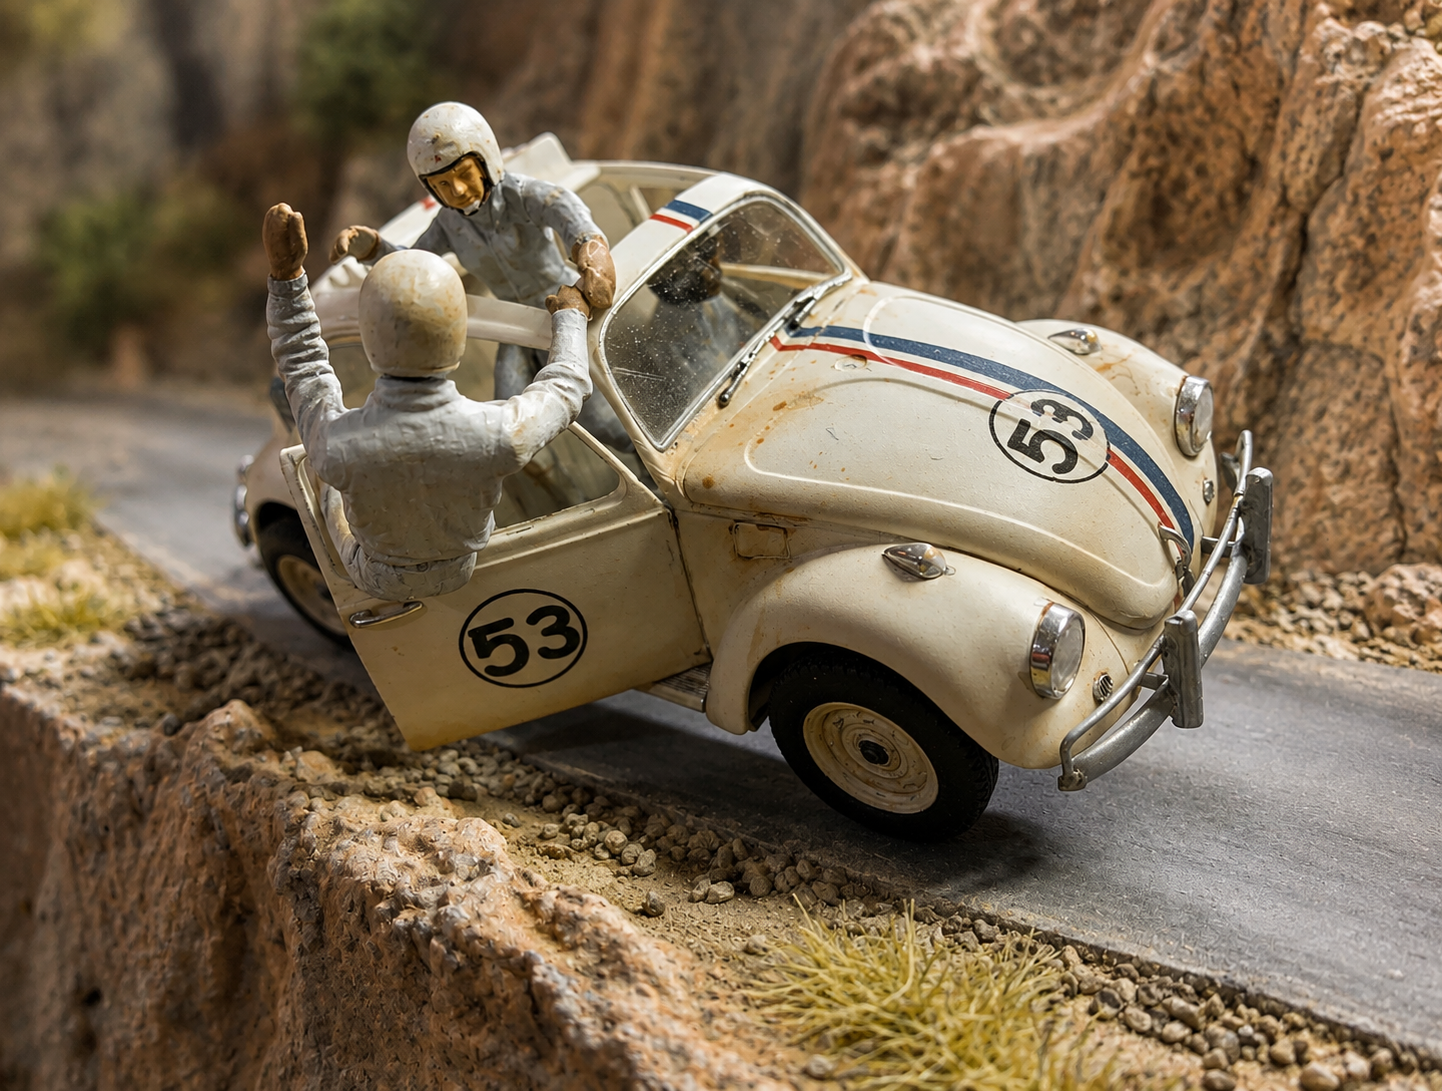
Without spending a small fortune on another kit, how could I tell Herbie's story? Not just any story, mind you, but the story on the front of the kit's box that just happened to be one of my favorite parts of the movie, because Herbie's resilience and the resilience of his humans is the part of the tale that really struck a nerve with me.
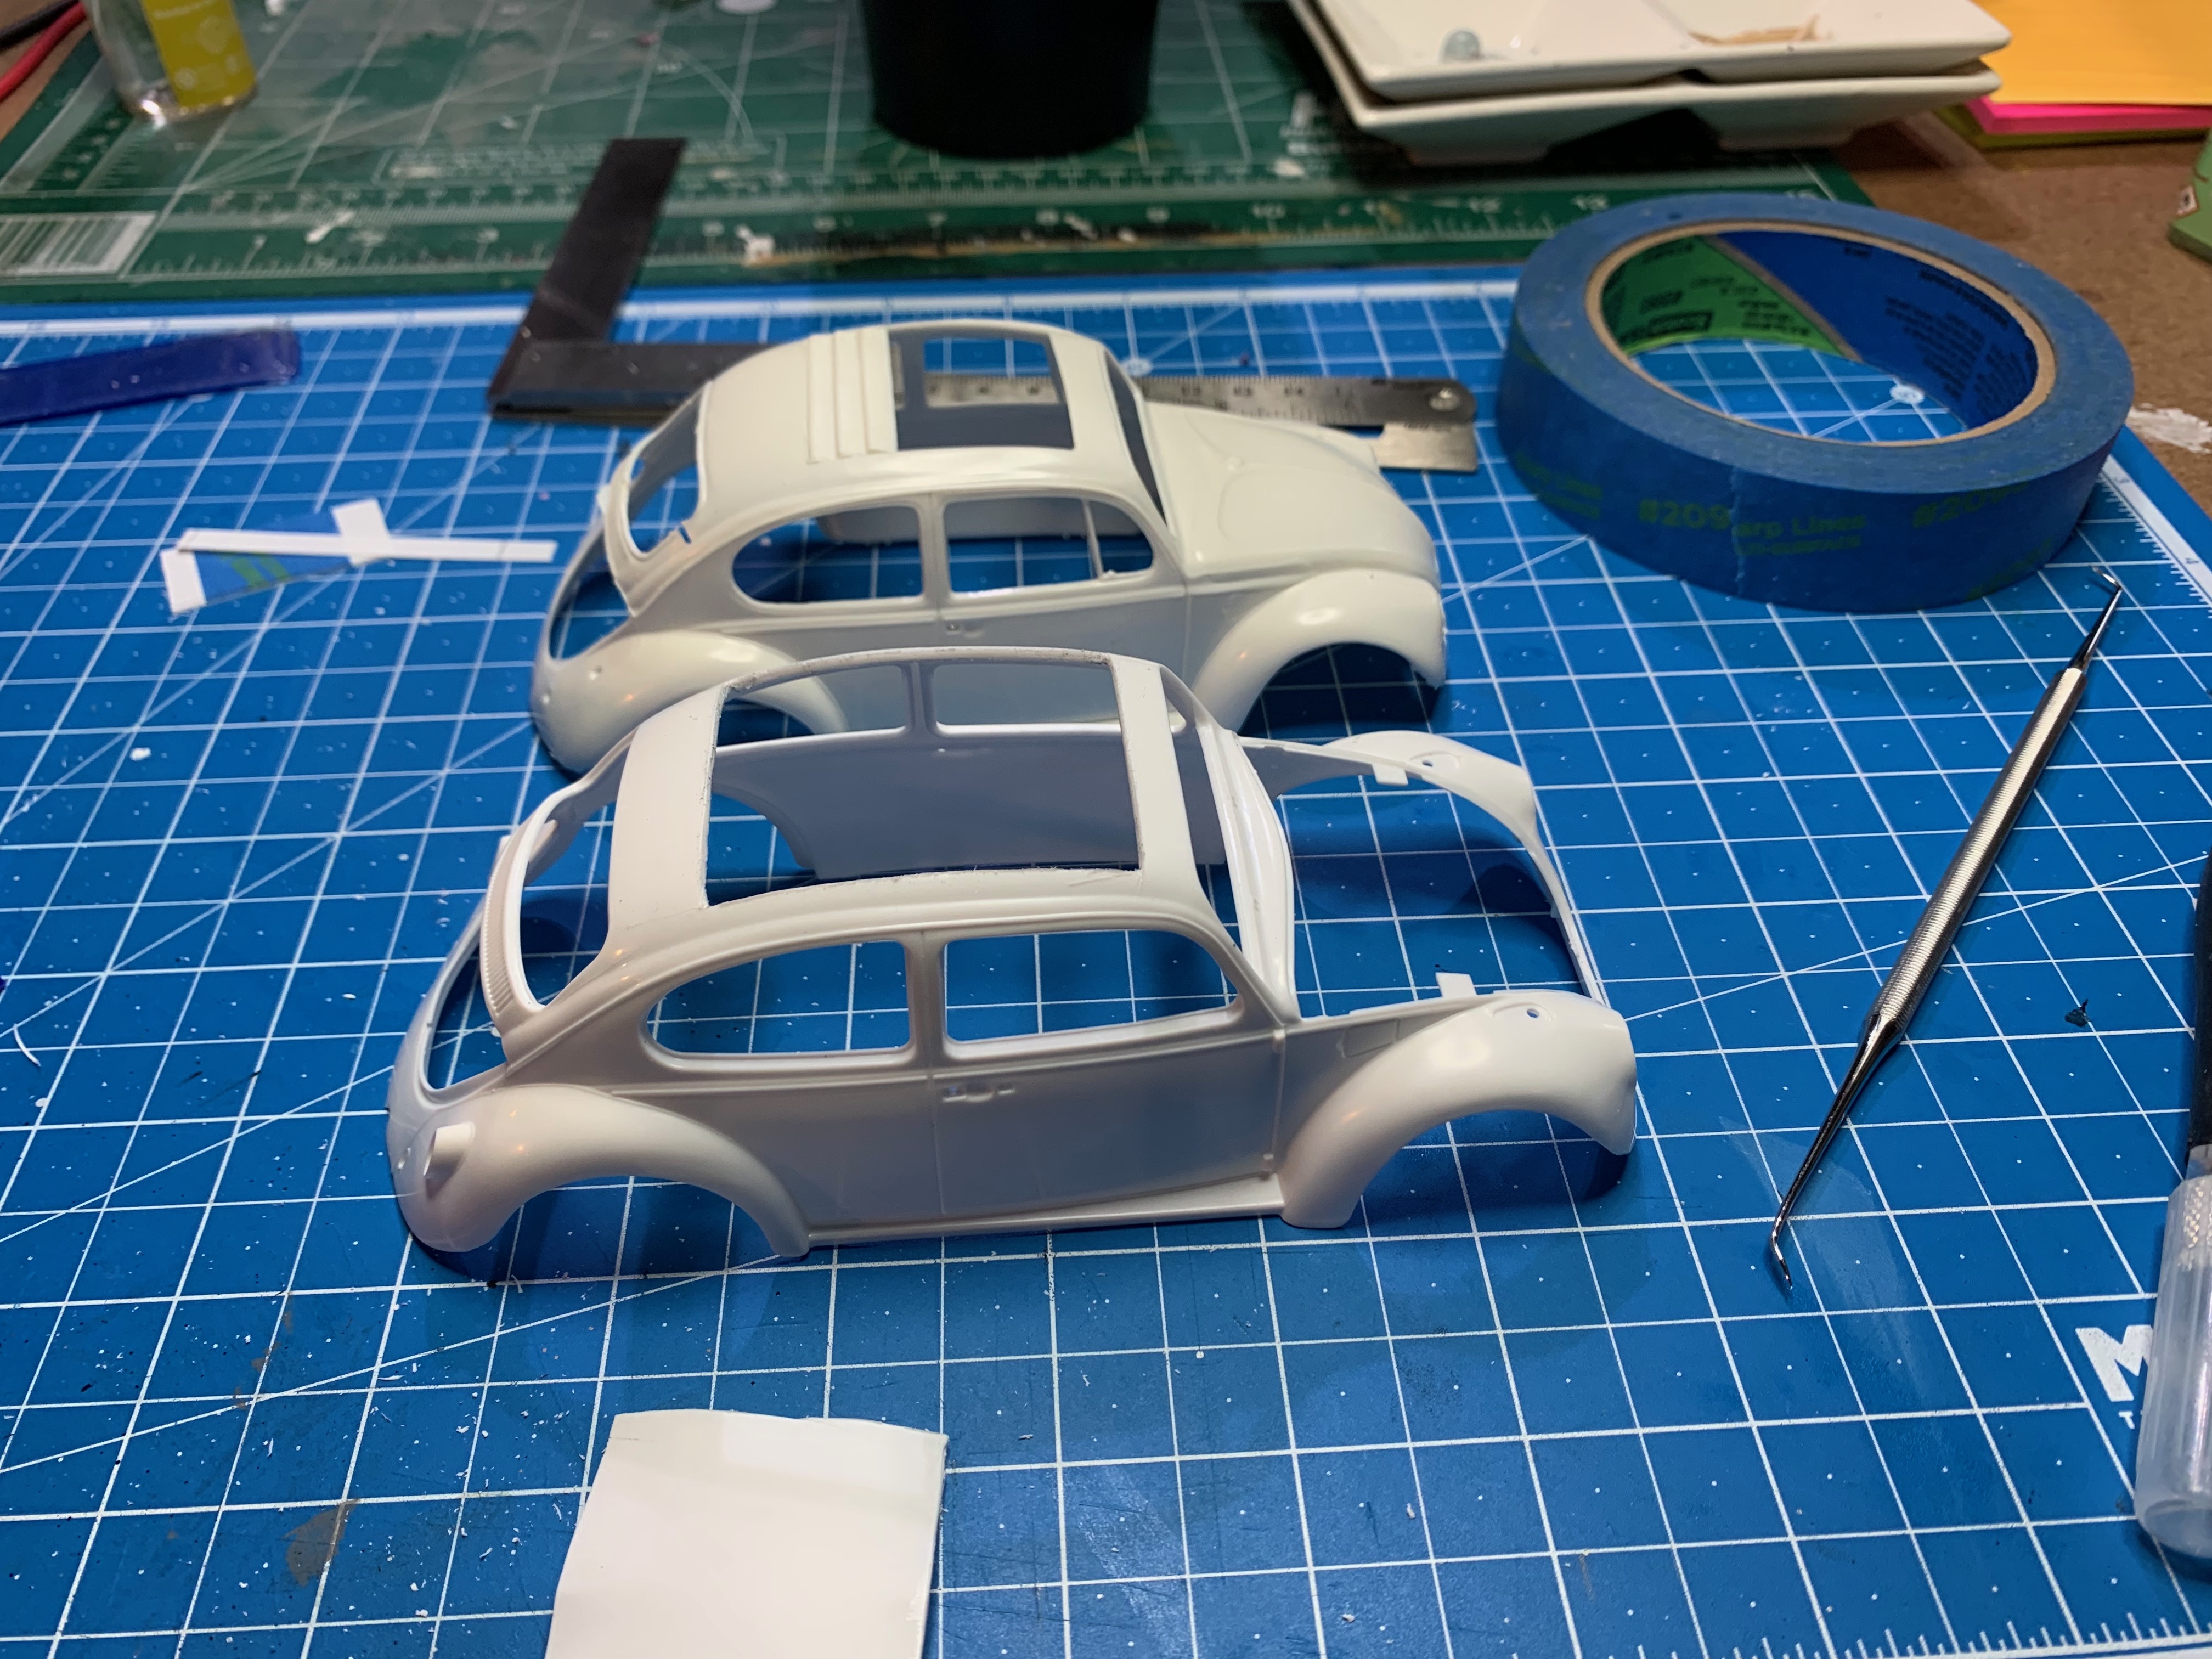
In order to make that come to life, the little car would have to have surgery. A door cut out, a wider moon roof to accommodate Carole as she tries to hold on to Tennessee.
- passenger door removed so it could be placed in the open position as Herbie goes around a treacherous canyon-rim road
- moon roof cut out
- better representation of the canvas moon roof cover
- Jim at the wheel
- missing front driver's-side wheel—the whole thing, meaning that part of the undercarriage has to be detailed
- car supported at a relatively high angle while riding on two wheels
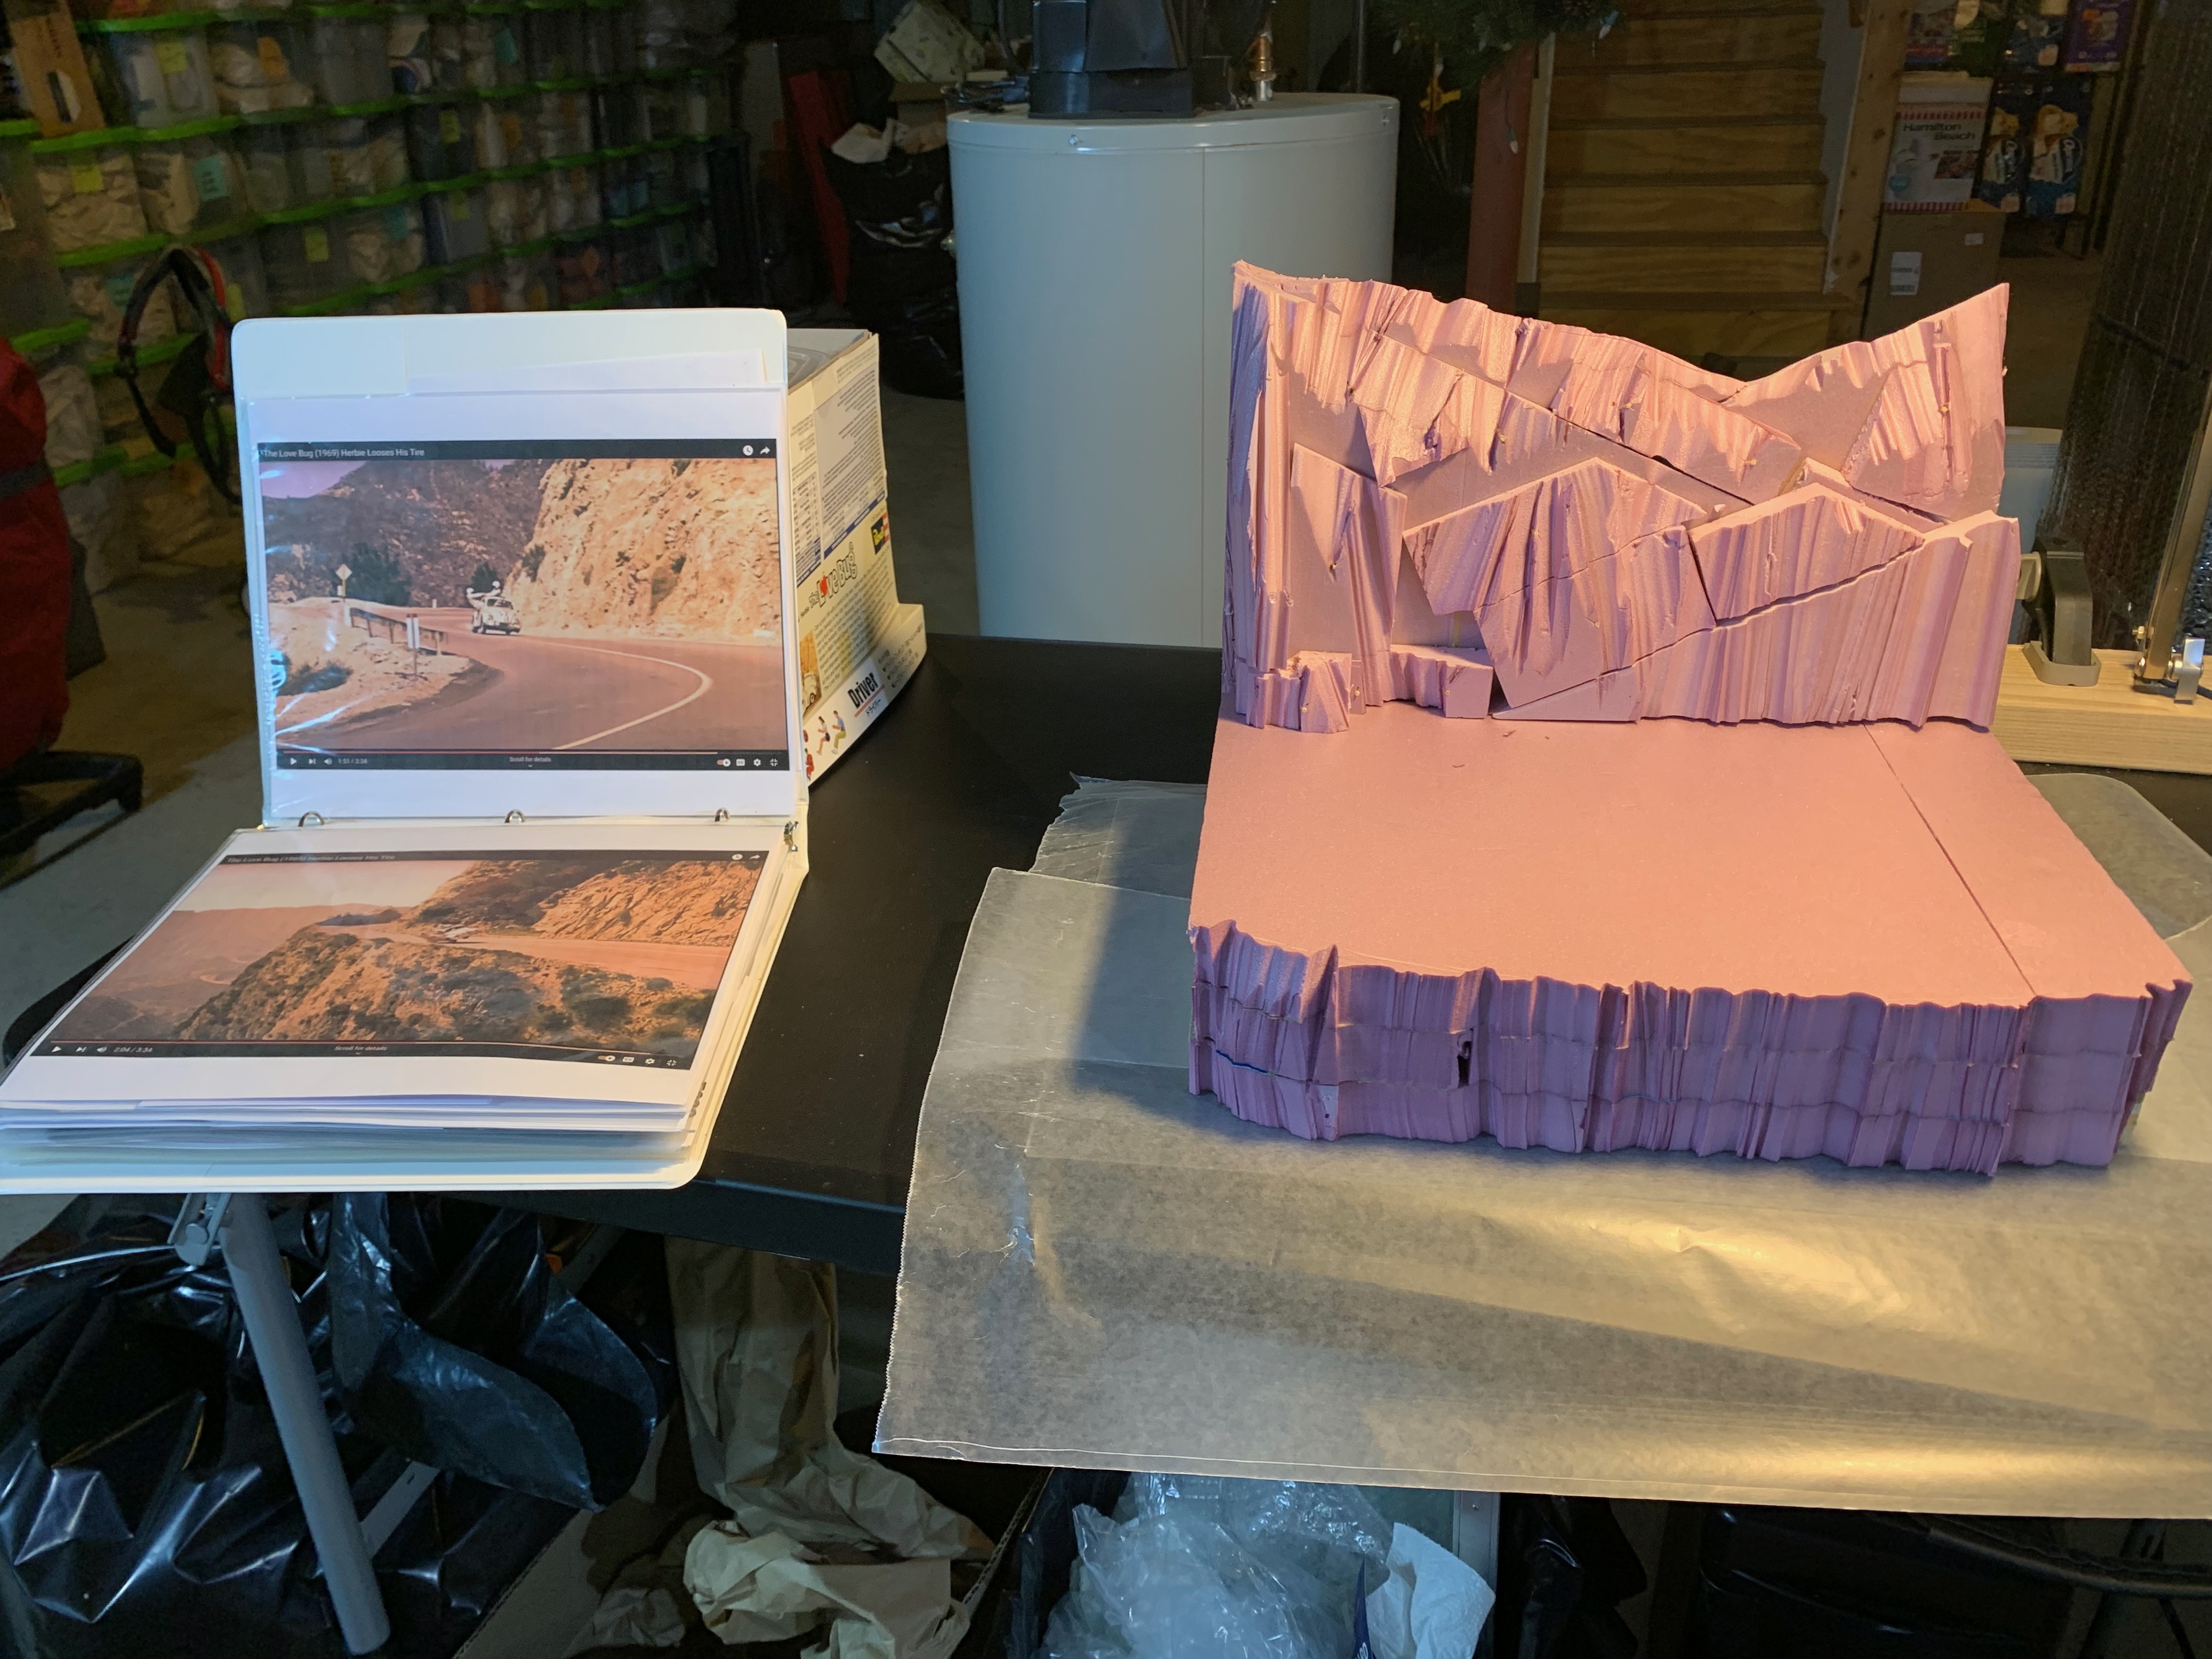
- the treacherous canyon-rim road—the diorama needs to be tall enough so the canyon rim falls down the front of the diorama
- the figures (not an off-the-shelf item, that's for sure)
Because of the surgery, I made the decision to look for a similar Volkswagen kit that I wouldn't be scared to cut into, one that I could buy again if I made a mistake.
At a local hobby shop, the kit almost leapt off the shelf. Or I leapt. Something leapt. A Revell (kit #85-4192)—1968 Volkswagen Beetle, 1:24 scale, new tooling introduced in 2013. Heavily discounted, I bought two.
One (or More) Glaring Differences
I unboxed one of the newer kits as soon as I got back to the workbench and started reviewing the parts and instructions. I quickly realized:
- this kit had chrome wheel covers. Herbie doesn't have any fancy wheel covers, especially while racing
- the front and rear bumpers lacked the towel bars/rails prominent on Herbie. That's the popular description.
- decals, obviously
- there is a slight size difference, with the newer kit being 1:24, while the original kit was 1:25.
Then I needed to tackle a couple of other important details—like how to make a canvas cover for the moon roof.
Rims/Wheels
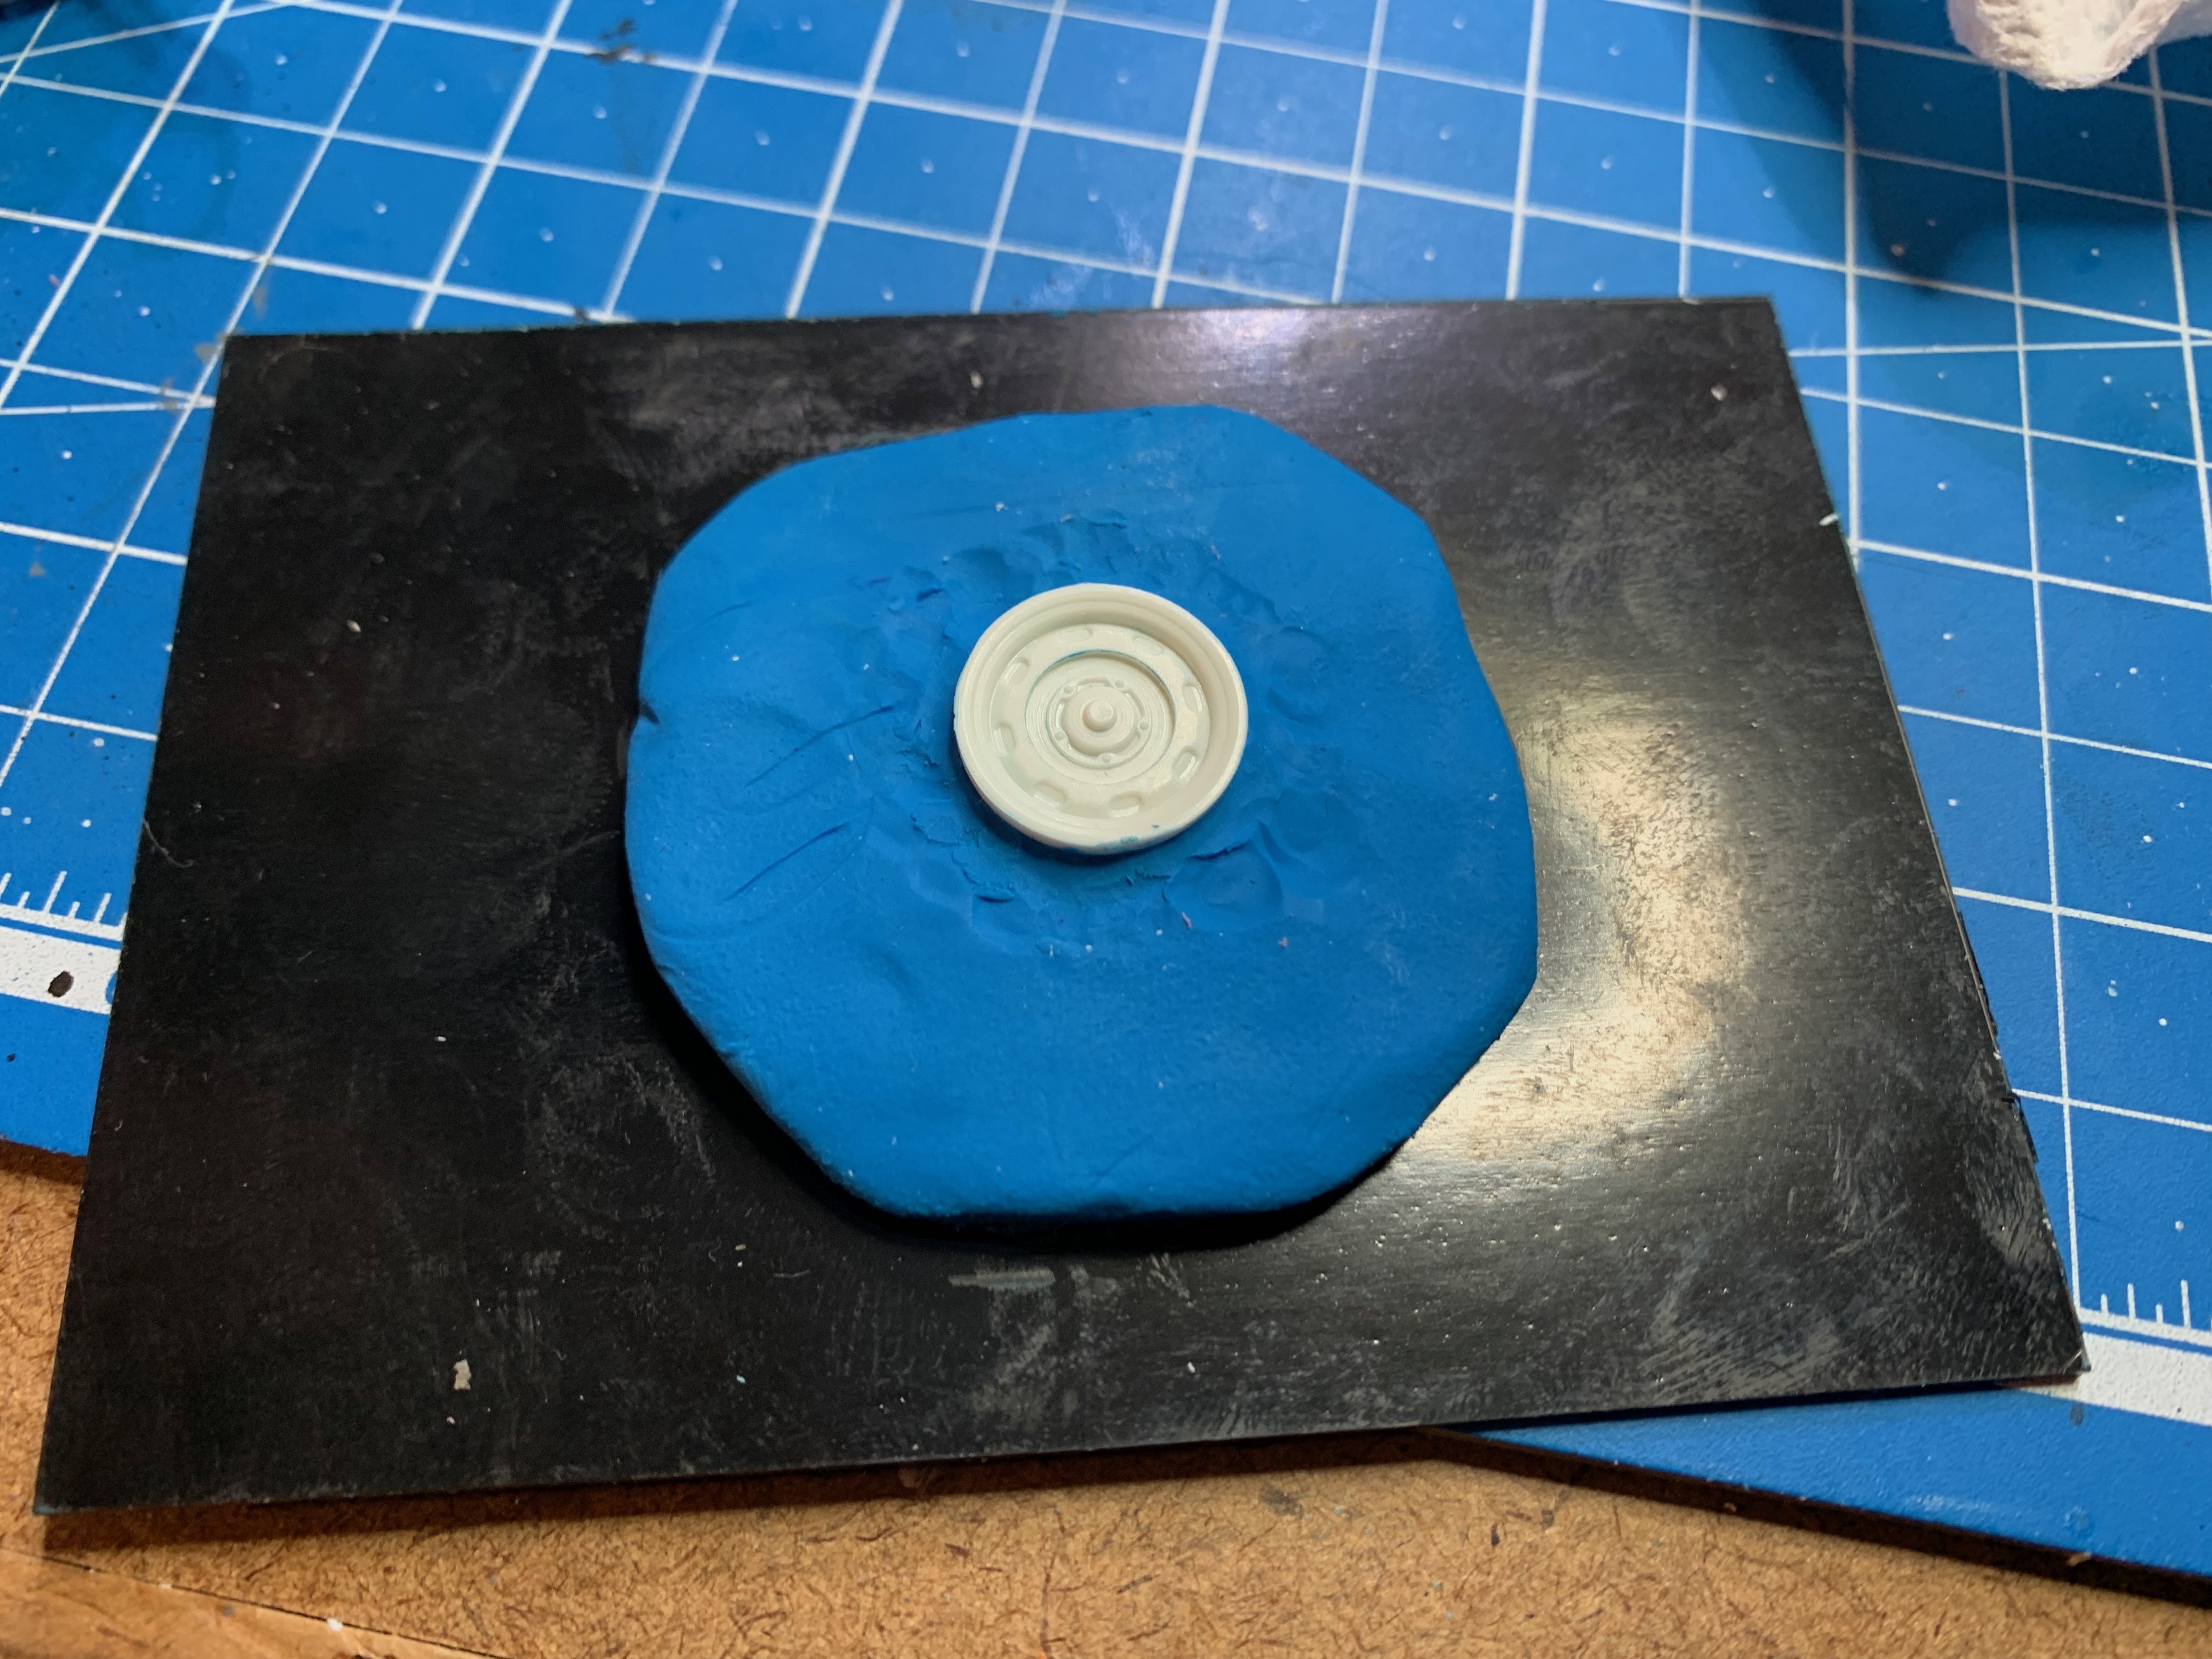
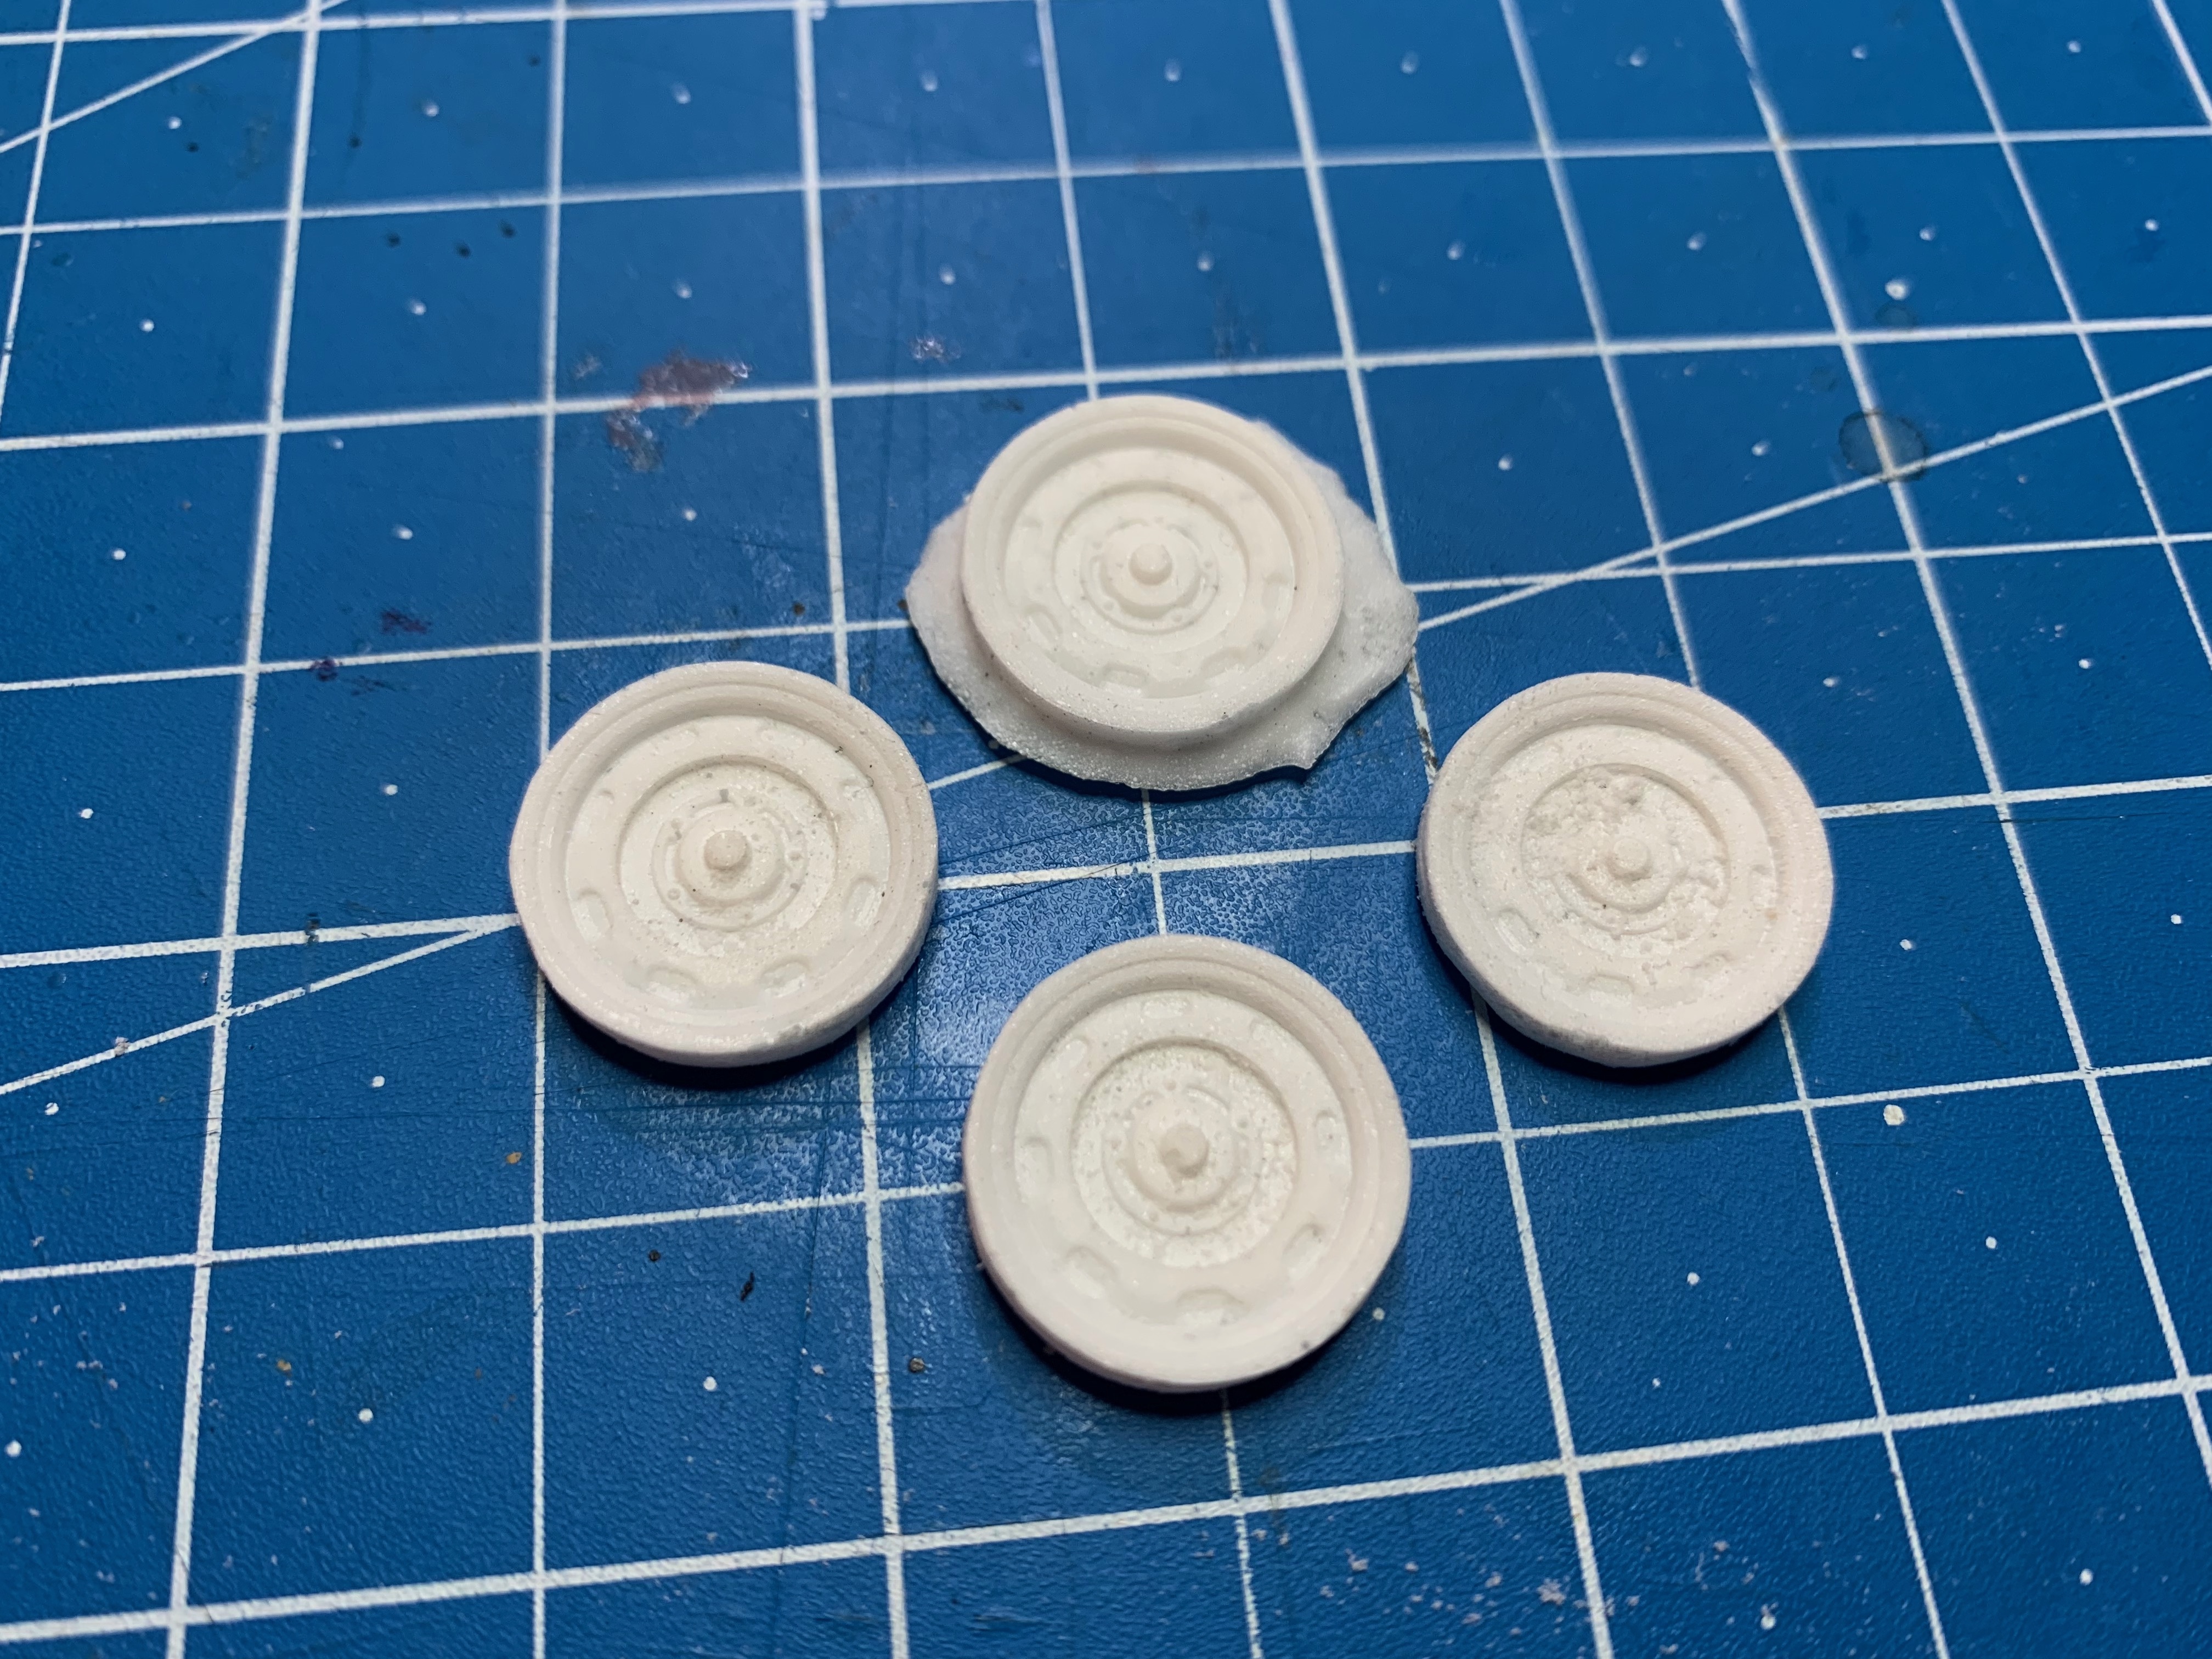
For the rims without the wheel covers, I decided I would carefully remove one of the original kit's parts from the sprue and make a mold from which I cast several. I only needed three, but I did a couple more....just in case.
The size difference between the wheels was negligible during buildup. They fit well with proper trimming and sanding.
Decals
I found an online supplier of decals who printed two sets in 1:24 for me, including the stripes I didn't, but maybe should've, used. I could also print some myself, but that's an experiment for another day.
Canvas Moon Roof Cover
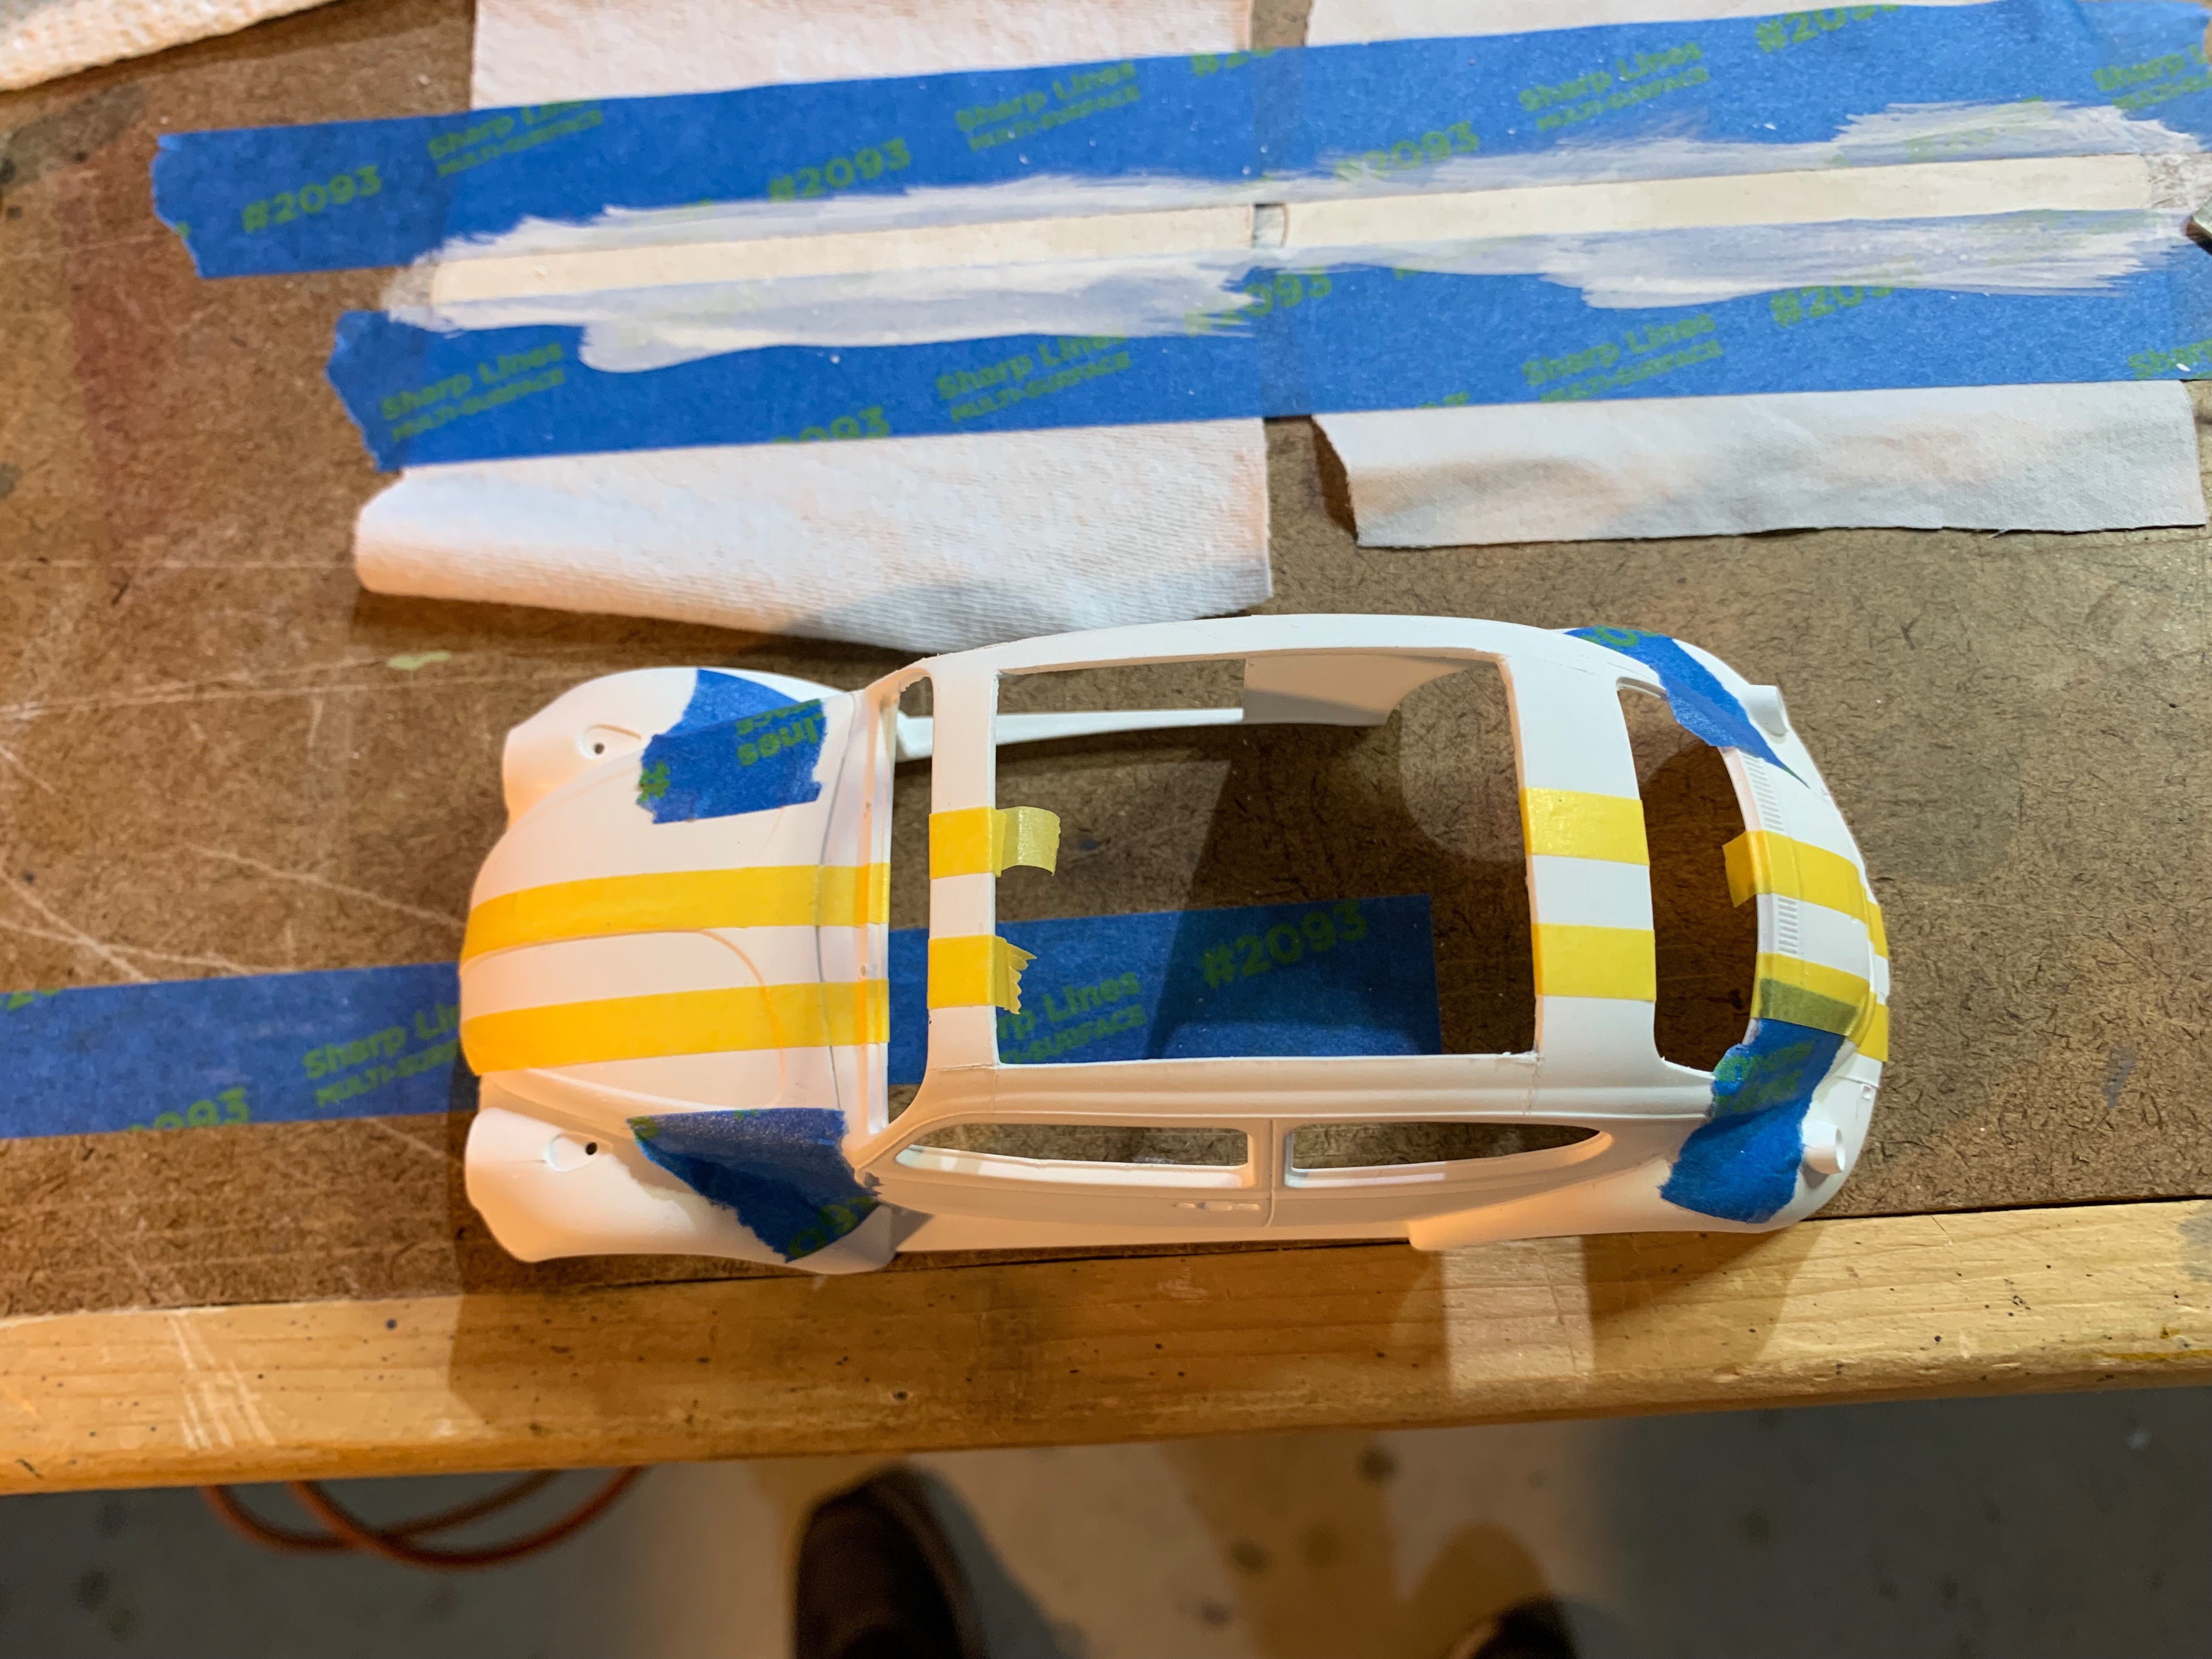
For a previous build, the Moebius Models Lost in Space Chariot, I had 3D printed a form for the curtains. It was essentially several closely spaced "waves." Using some diluted Mod Podge, a portion of paper shop towel (with no design printed or embossed), and a little patience, I could form the shop towel into a wavy shape that, once painted, resembled the Mylar curtains of the Chariot way better than the formed styrene pieces.
So, I dug the form out of the sprues box. I knew I wouldn't be able to paint the part after forming, so I taped a square of shop towel to the bench and tried to paint the stripes several different ways. The decals wouldn't work for this. Taped strips would be worse; they sat "proud" of the surface.
I went digging through the supplies and found an old pillowcase. I cut it into a square wide enough that I could trim it to fit once done. I taped the square to a flat part of the bench, lightly coated it with my Mod Podge mix, and waited for it to dry.
I then taped off a strip wide enough for all three stripes and sprayed white acrylic. It was a little rough along the edges, because trying to seal cloth is like, well, trying to seal cloth. I removed that tape and taped off the red stripe, sprayed that, and then did the blue.
Once everything was dry, I removed the cloth from the bench, dampened it, pushed it into the form, and applied the Mod Podge mix once again.
This was a whole day in the workshop.
Towel-Rail Bumpers
Next, a little wire and some plastic sprue were all that was needed to replicate the towel-rail bumpers. Having these ready to go was the step that told me the story was being told.
Once Upon a Time...
Tennessee Steinmetz said it best...
"We take machines and we stuff 'em with information until they're smarter than we are! Take a car. Most guys spread more love and time and money on their car in a week than they do on their wife and kids in a year. Pretty soon, you know what? The machine starts to think it is somebody.”
This is how a ten-year-old boy falls in love with a car, because, as we all know, it isn't just a car.
Nope—the car is just one character among characters.
Jim and Carole and Tennessee
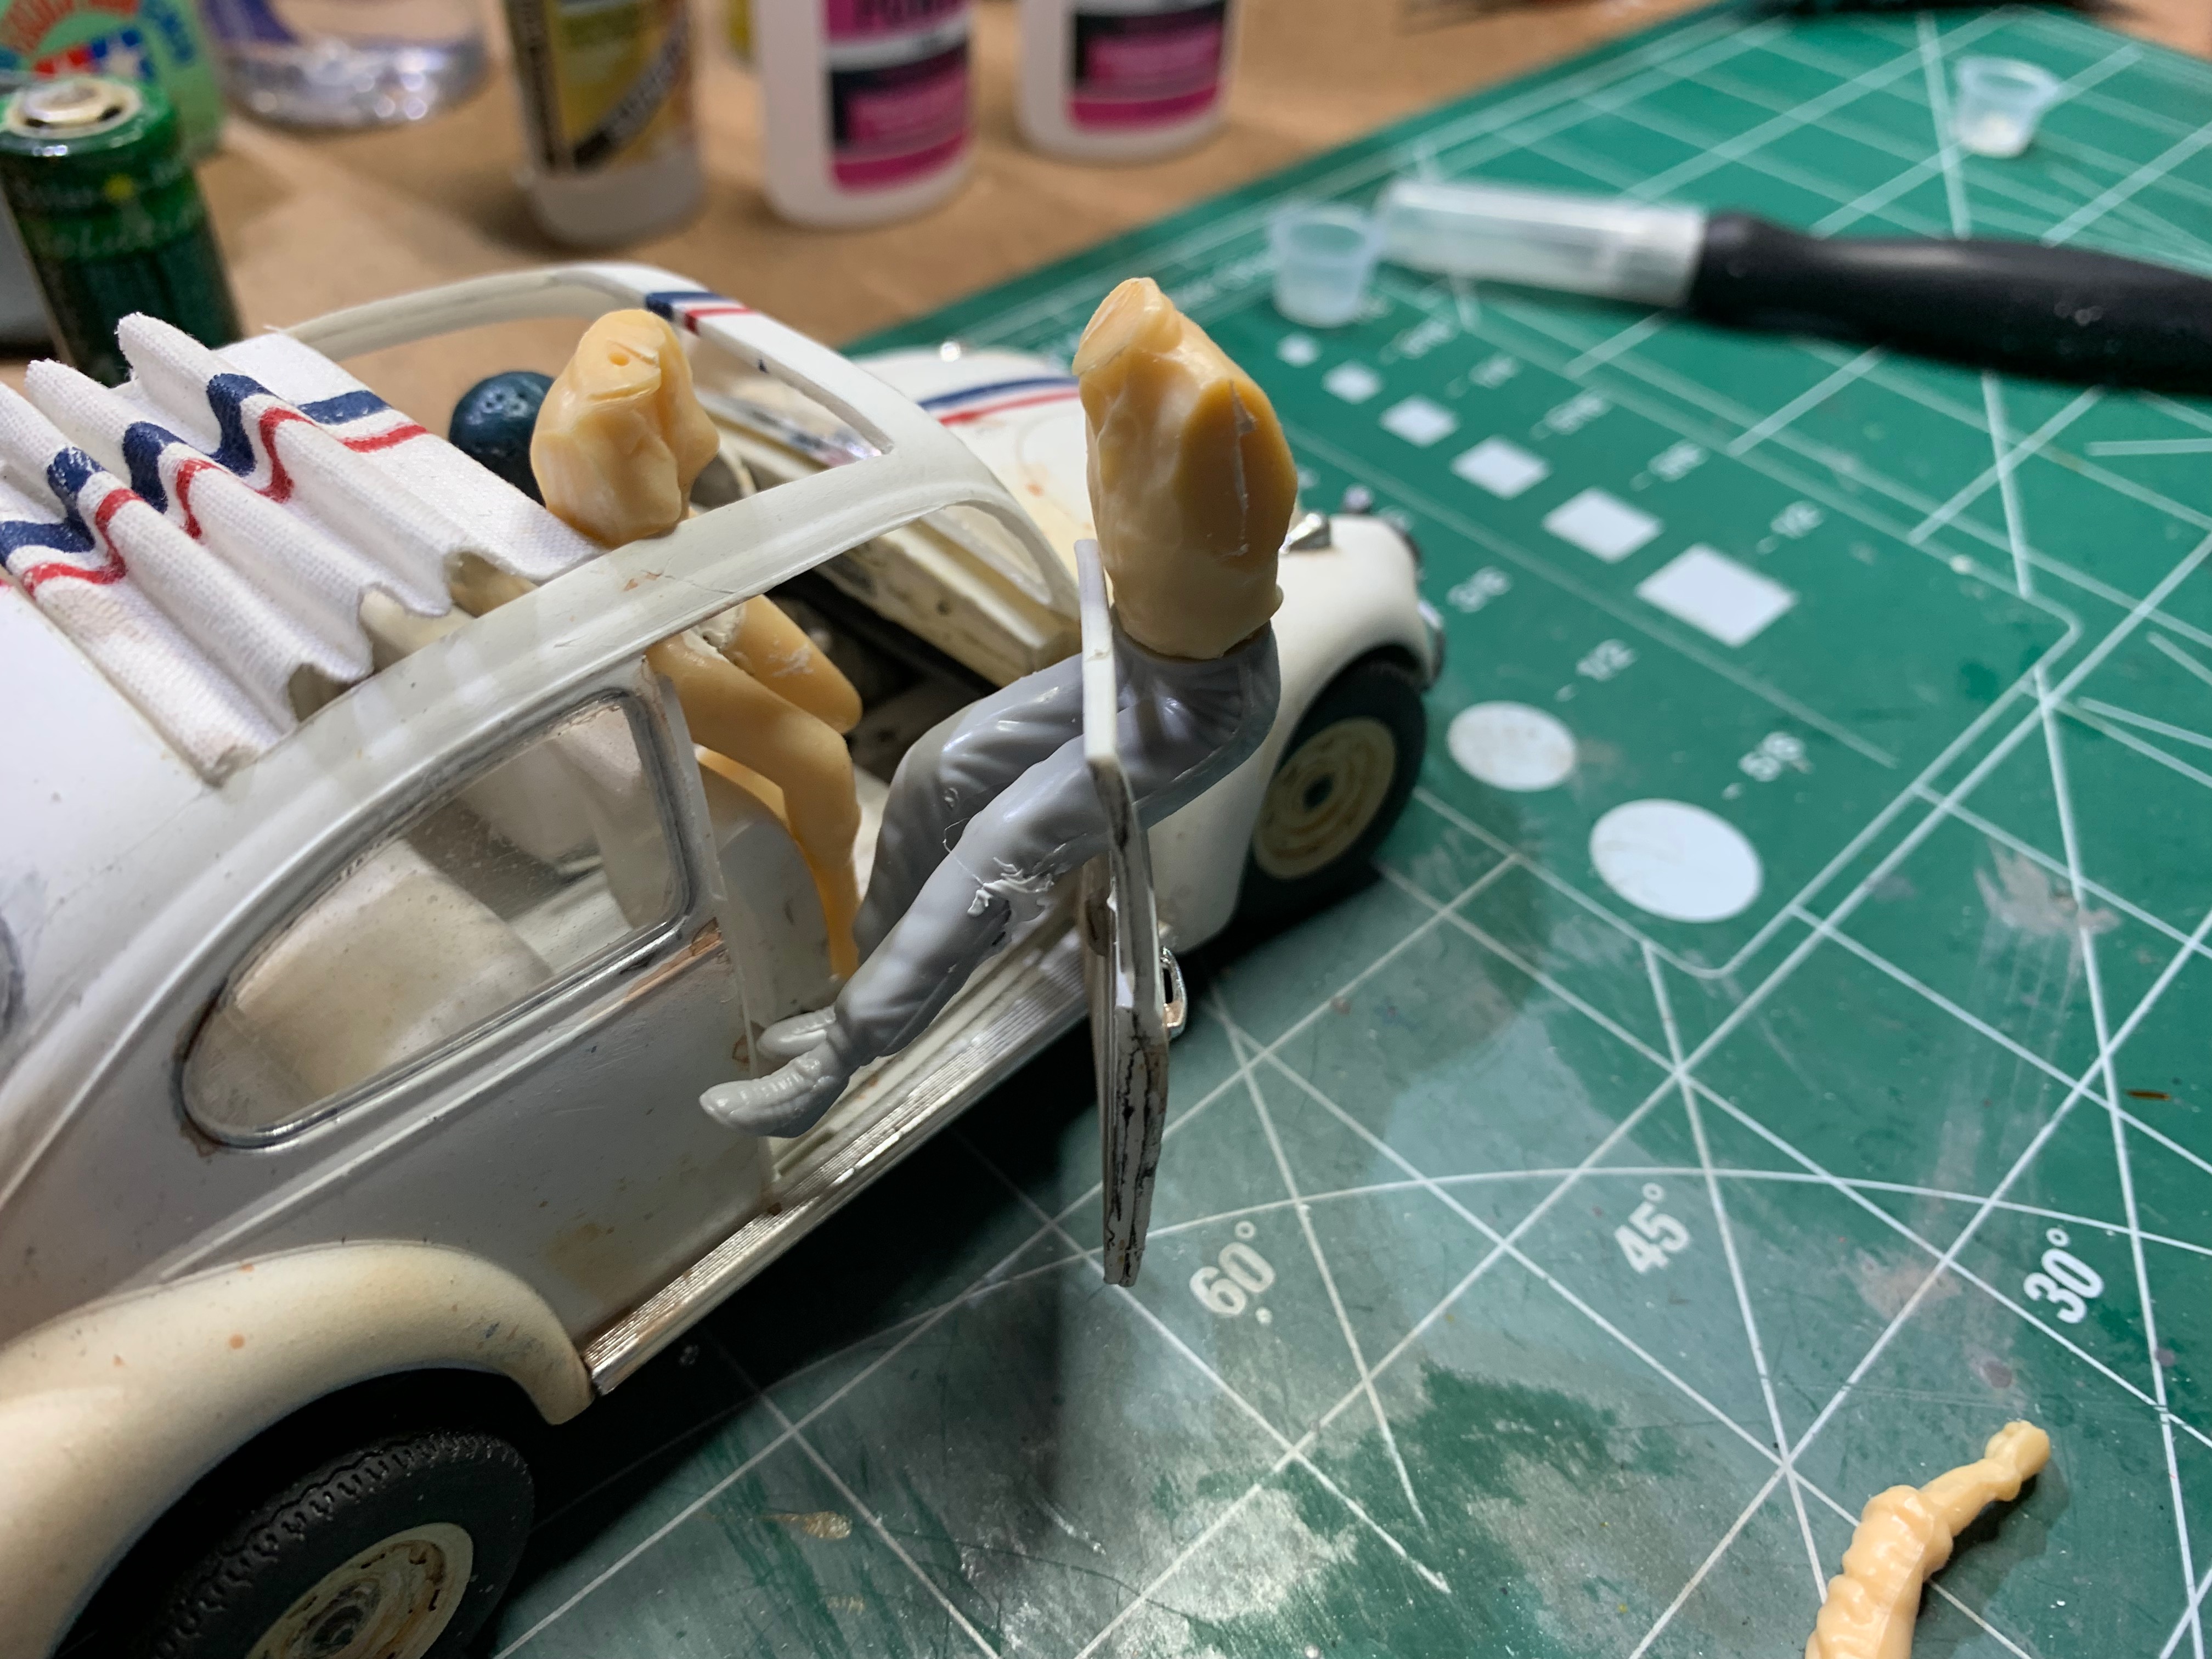
Since we know these three are going to be needed to make my vision come to life, I started searching. There are a couple of properly scaled race car driver kits, but they could only offer a little for the other characters. First, none have the right helmet, which is just a plain crash helmet with no bill or face shield. Jim's is metallic blue, while Carole and Tennessee have white helmets. And distinctive chin straps, according to my reference pics.
To get the right head, I had to shave and sand the bill off an existing helmet, make a mold, then cast several to play with. Drill holes and insert some wire in the neck.
I ended up using a lot of wire.
I found body parts in several G-scale model railroad figures. I had a couple of other 1:24 figures hanging around (including one nearly perfect for Britt Reid as the Green Hornet). So, I cut, heated, wired, bent, painted, painted again, filled, sanded, more paint and finally—three reasonable facsimiles of the other characters in our story.
Especially if you use the ten-foot rule. Or even three.
Surgery on The Car
With the appropriate amount of anesthesia, I prepped the car body for the two major cuts.
To remove the door, I used carefully placed holes with a pin vise in the groove where the edge of the door would be. I scored the groove with a very sharp (ask me how I know) X-Acto knife, being careful to preserve as much of the hinges as possible.
Then, solidly holding the car body in a PanaVise, I fed a length of dental floss through the hole and gently sawed through the scored groove until the door gave way. Since the interior of the car is captured in other pieces, I repeated the process so I could get the interior of the door intact as well.
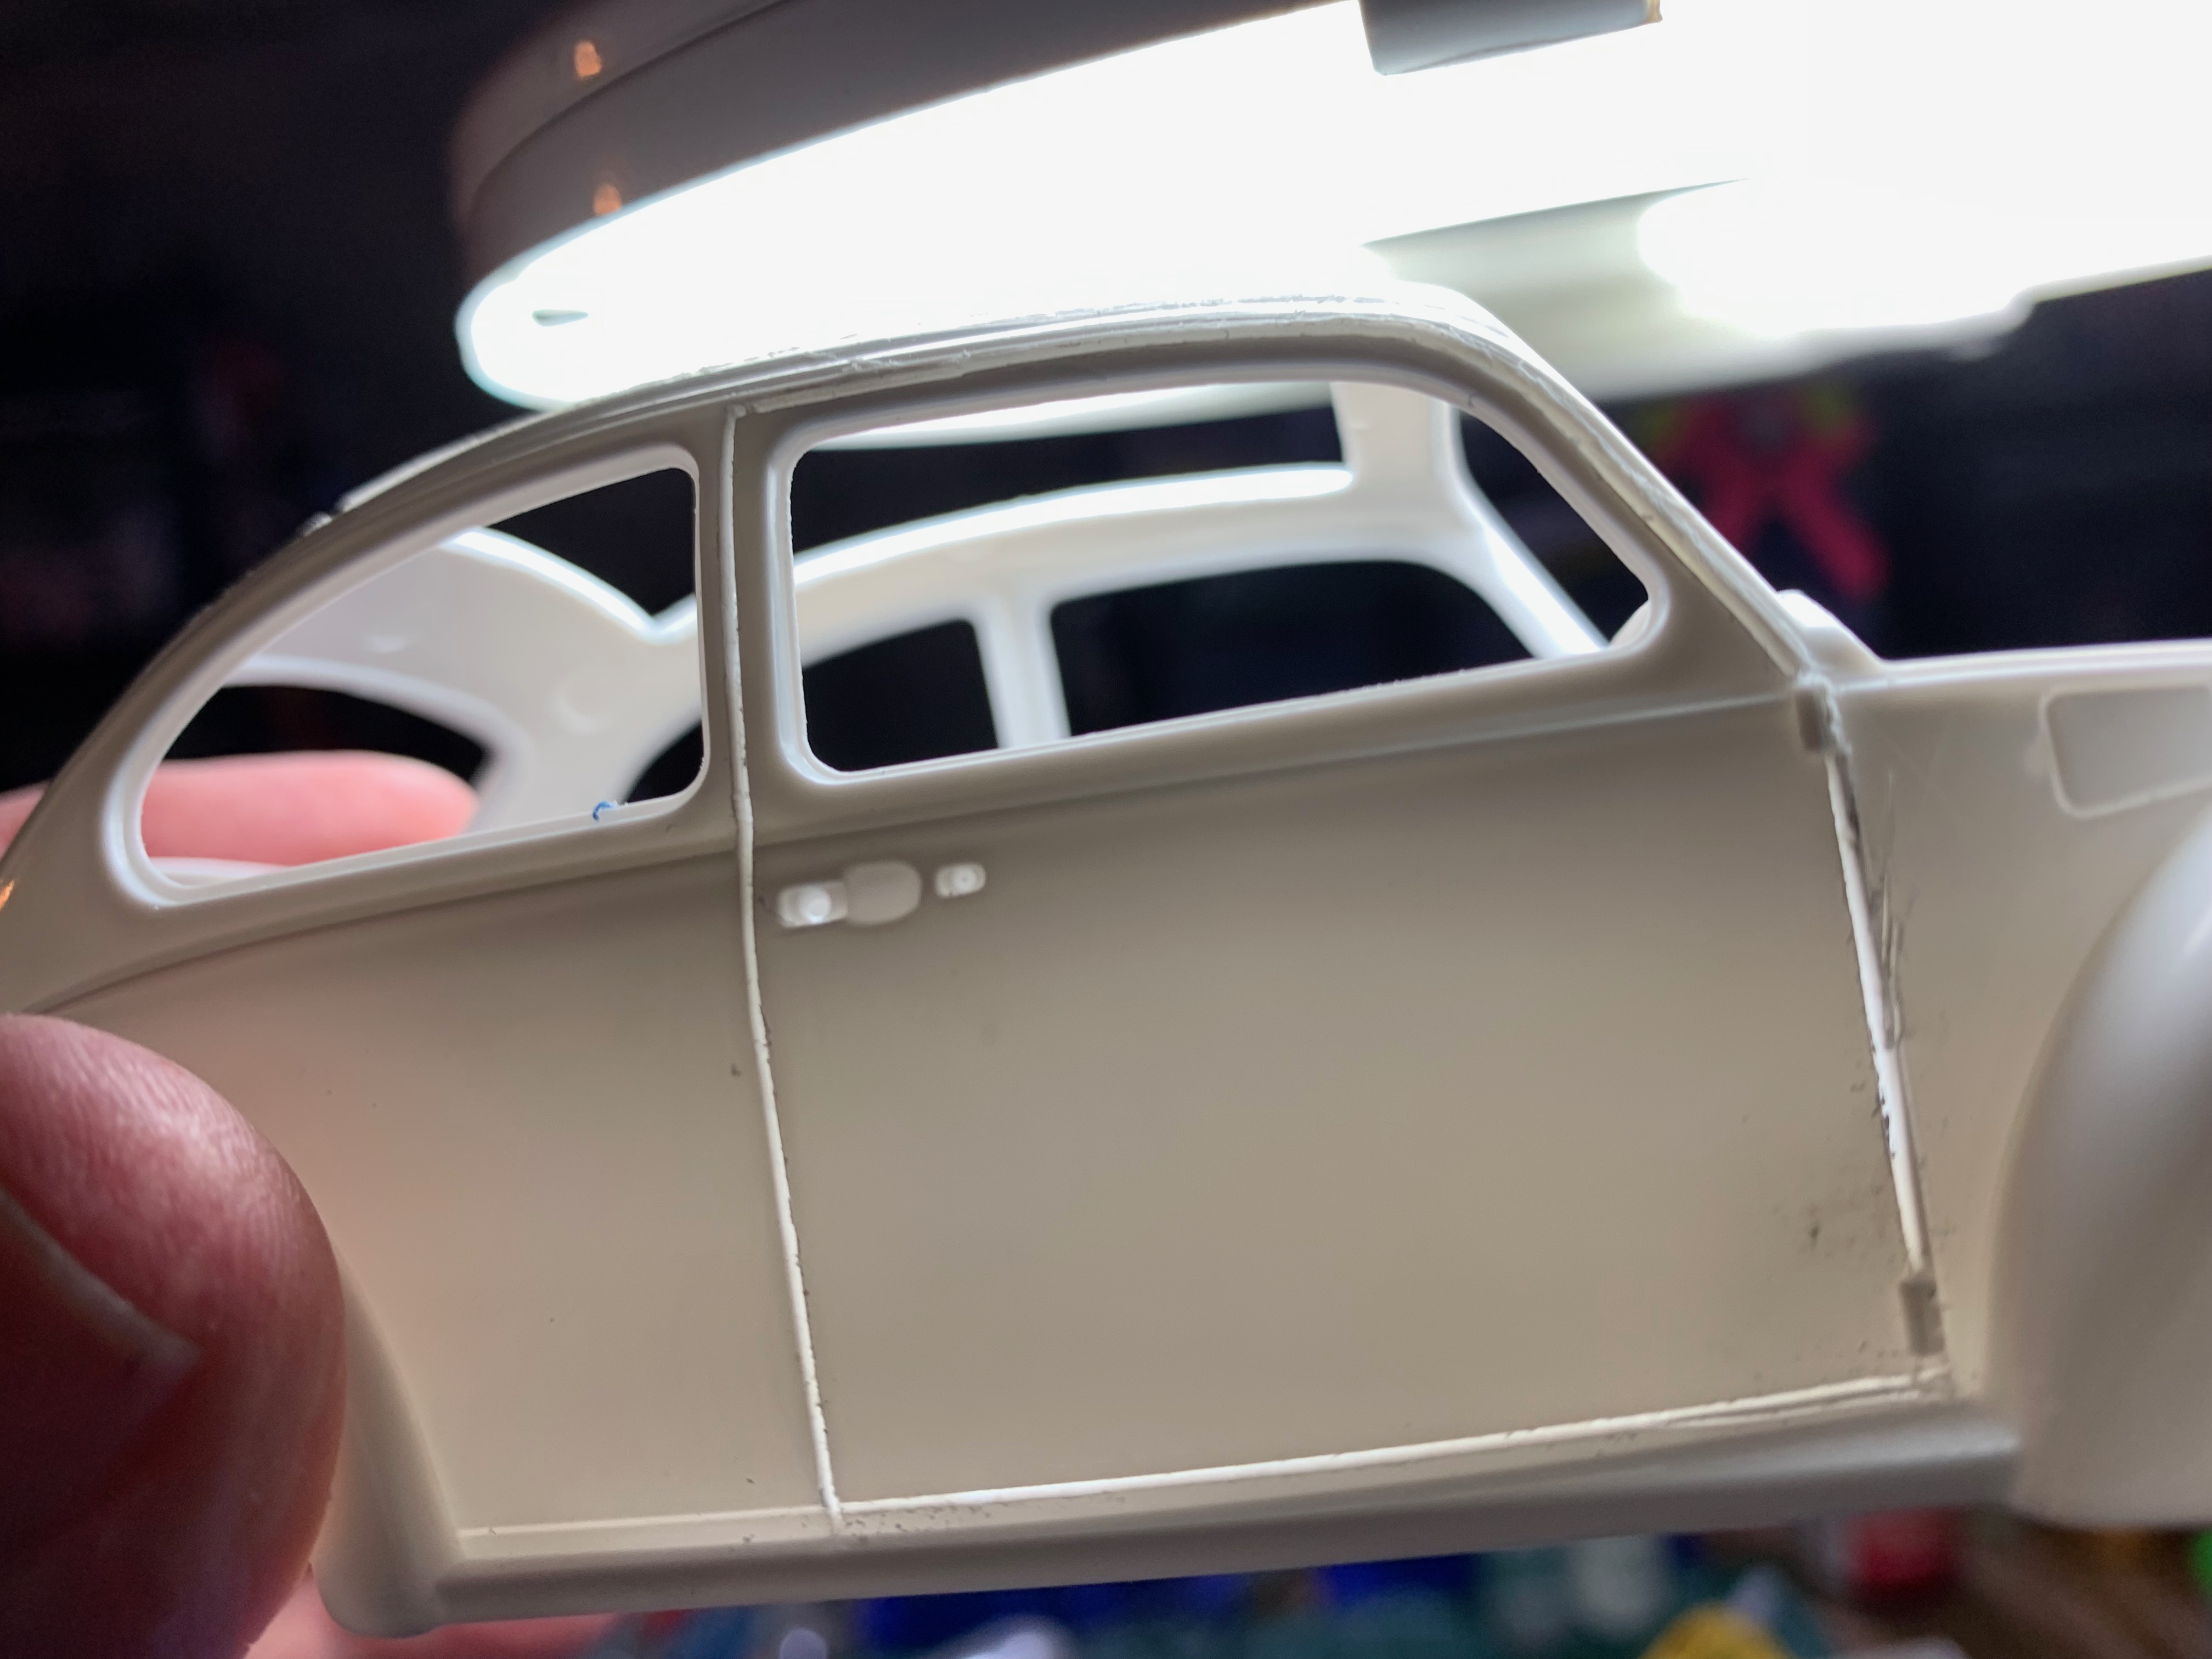
I created a template for cutting the moon roof and attached that to the top of the body. First, I scored it with the X-Acto knife and followed that up with a panel-line scriber to get more depth. I completed this process the same way as the door—carefully drilled small holes and dental floss.
And a nice, minty smell.
For the missing wheel, I needed to complete what would appear to be a wheel hub minus its tire. Believe it or not, there is healthy debate about the wheel lugs being in the hub or as part of the wheel screws themselves. I favored having the five lugs sticking out a little. Some carefully drilled holes and short pieces of wire got me to where I wanted to be here.
And that was that for the surgery.
Surprisingly, I Followed Most of the Instructions
Yep. I built and painted the engine, exhaust, undercarriage, and other things that I knew would be there but never seen. I did skip some of the bits that I could not see in the screen grabs of the car, like the side mirror, rearview mirror, license plates, etc.
If you look closely, some grabs have these parts, some don't. For me, I know I was working with Herbie's stunt double—or at least one of his stunt doubles.
The Diorama
For a few of my most recent dioramas I have been asking myself, "How would this look hanging on a wall?"
My notebook lists several ideas for dioramas, and I have completed a Star Wars X-Wing chase scene and the classic Space Taxi (Willy Ley), positioned in front of a canvas-like background. From a distance, the diorama could appear as a complete picture.
That's a key takeaway.
The majority of dioramas we build are "flat," which means the diorama is the base of the tableau.
Herbie needs a base to complete the moment in time I am describing, but I also want to be able to hang it from a figurative wall, so that looking directly at the diorama gives you a picture, not something sitting on a base. I have sketched out several small and a couple of large dioramas with this in mind.
But Herbie also needs to be on a road overhanging a cliff, because that is very important to the scene at hand.
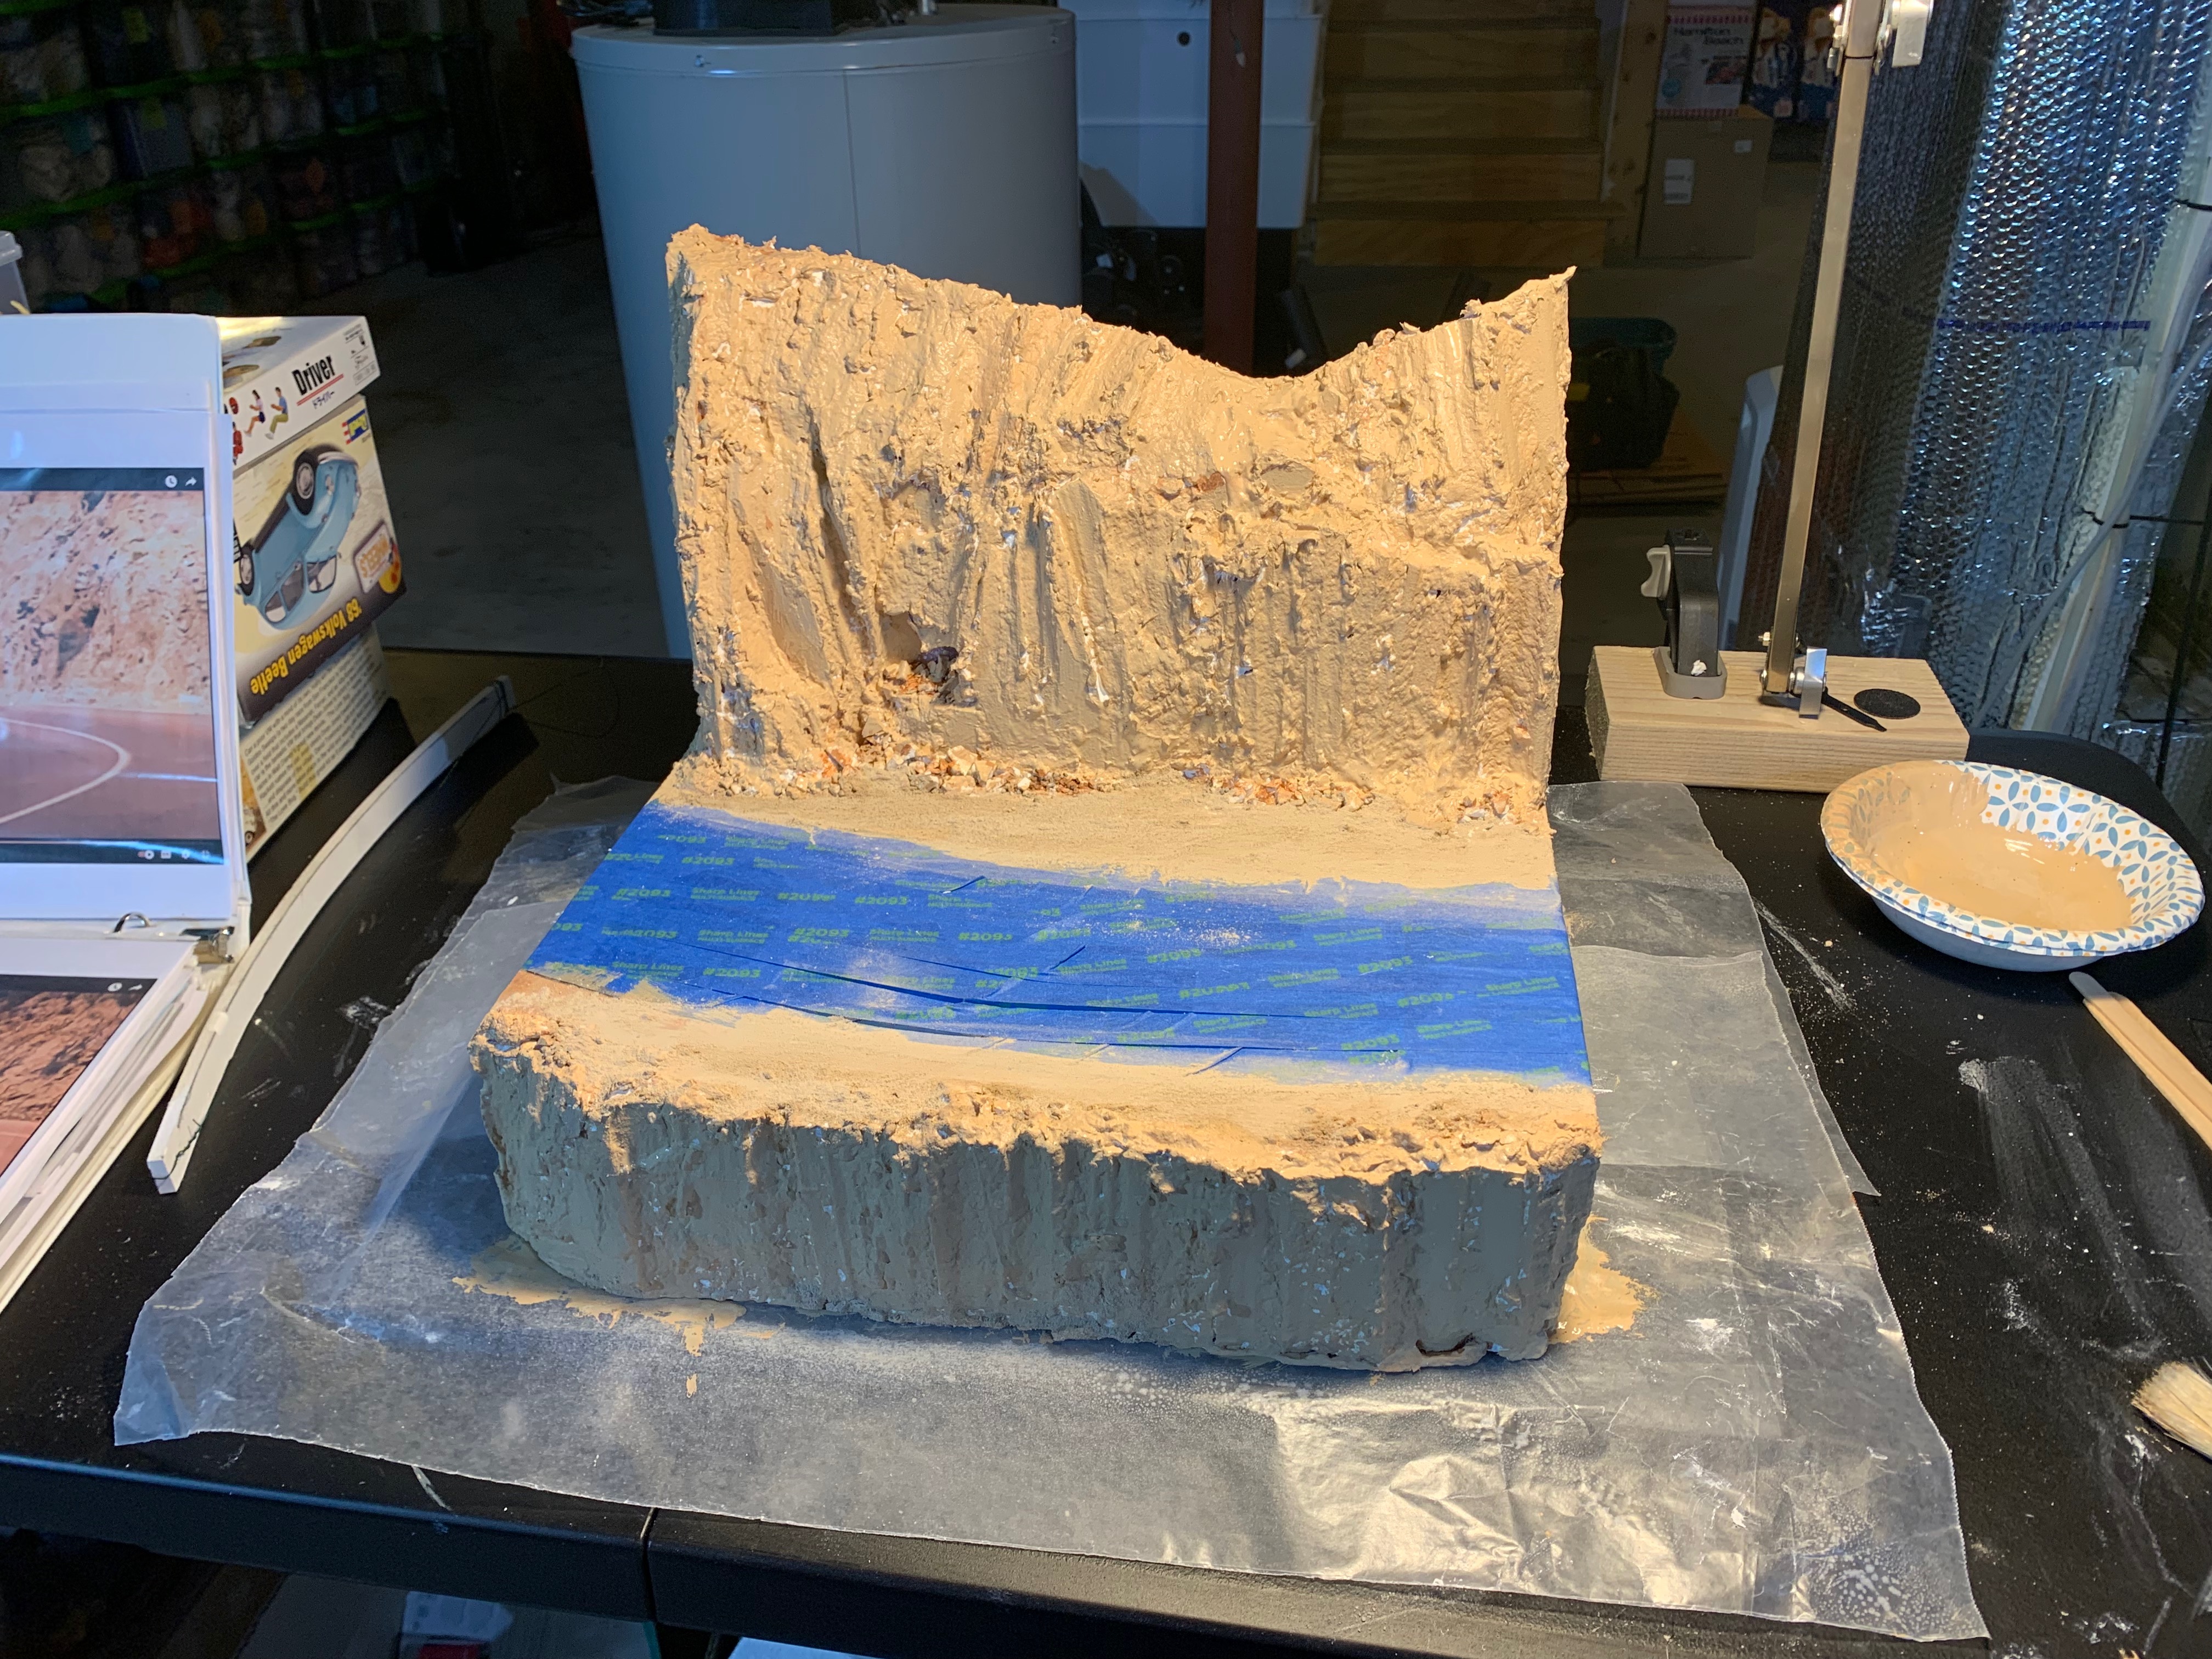
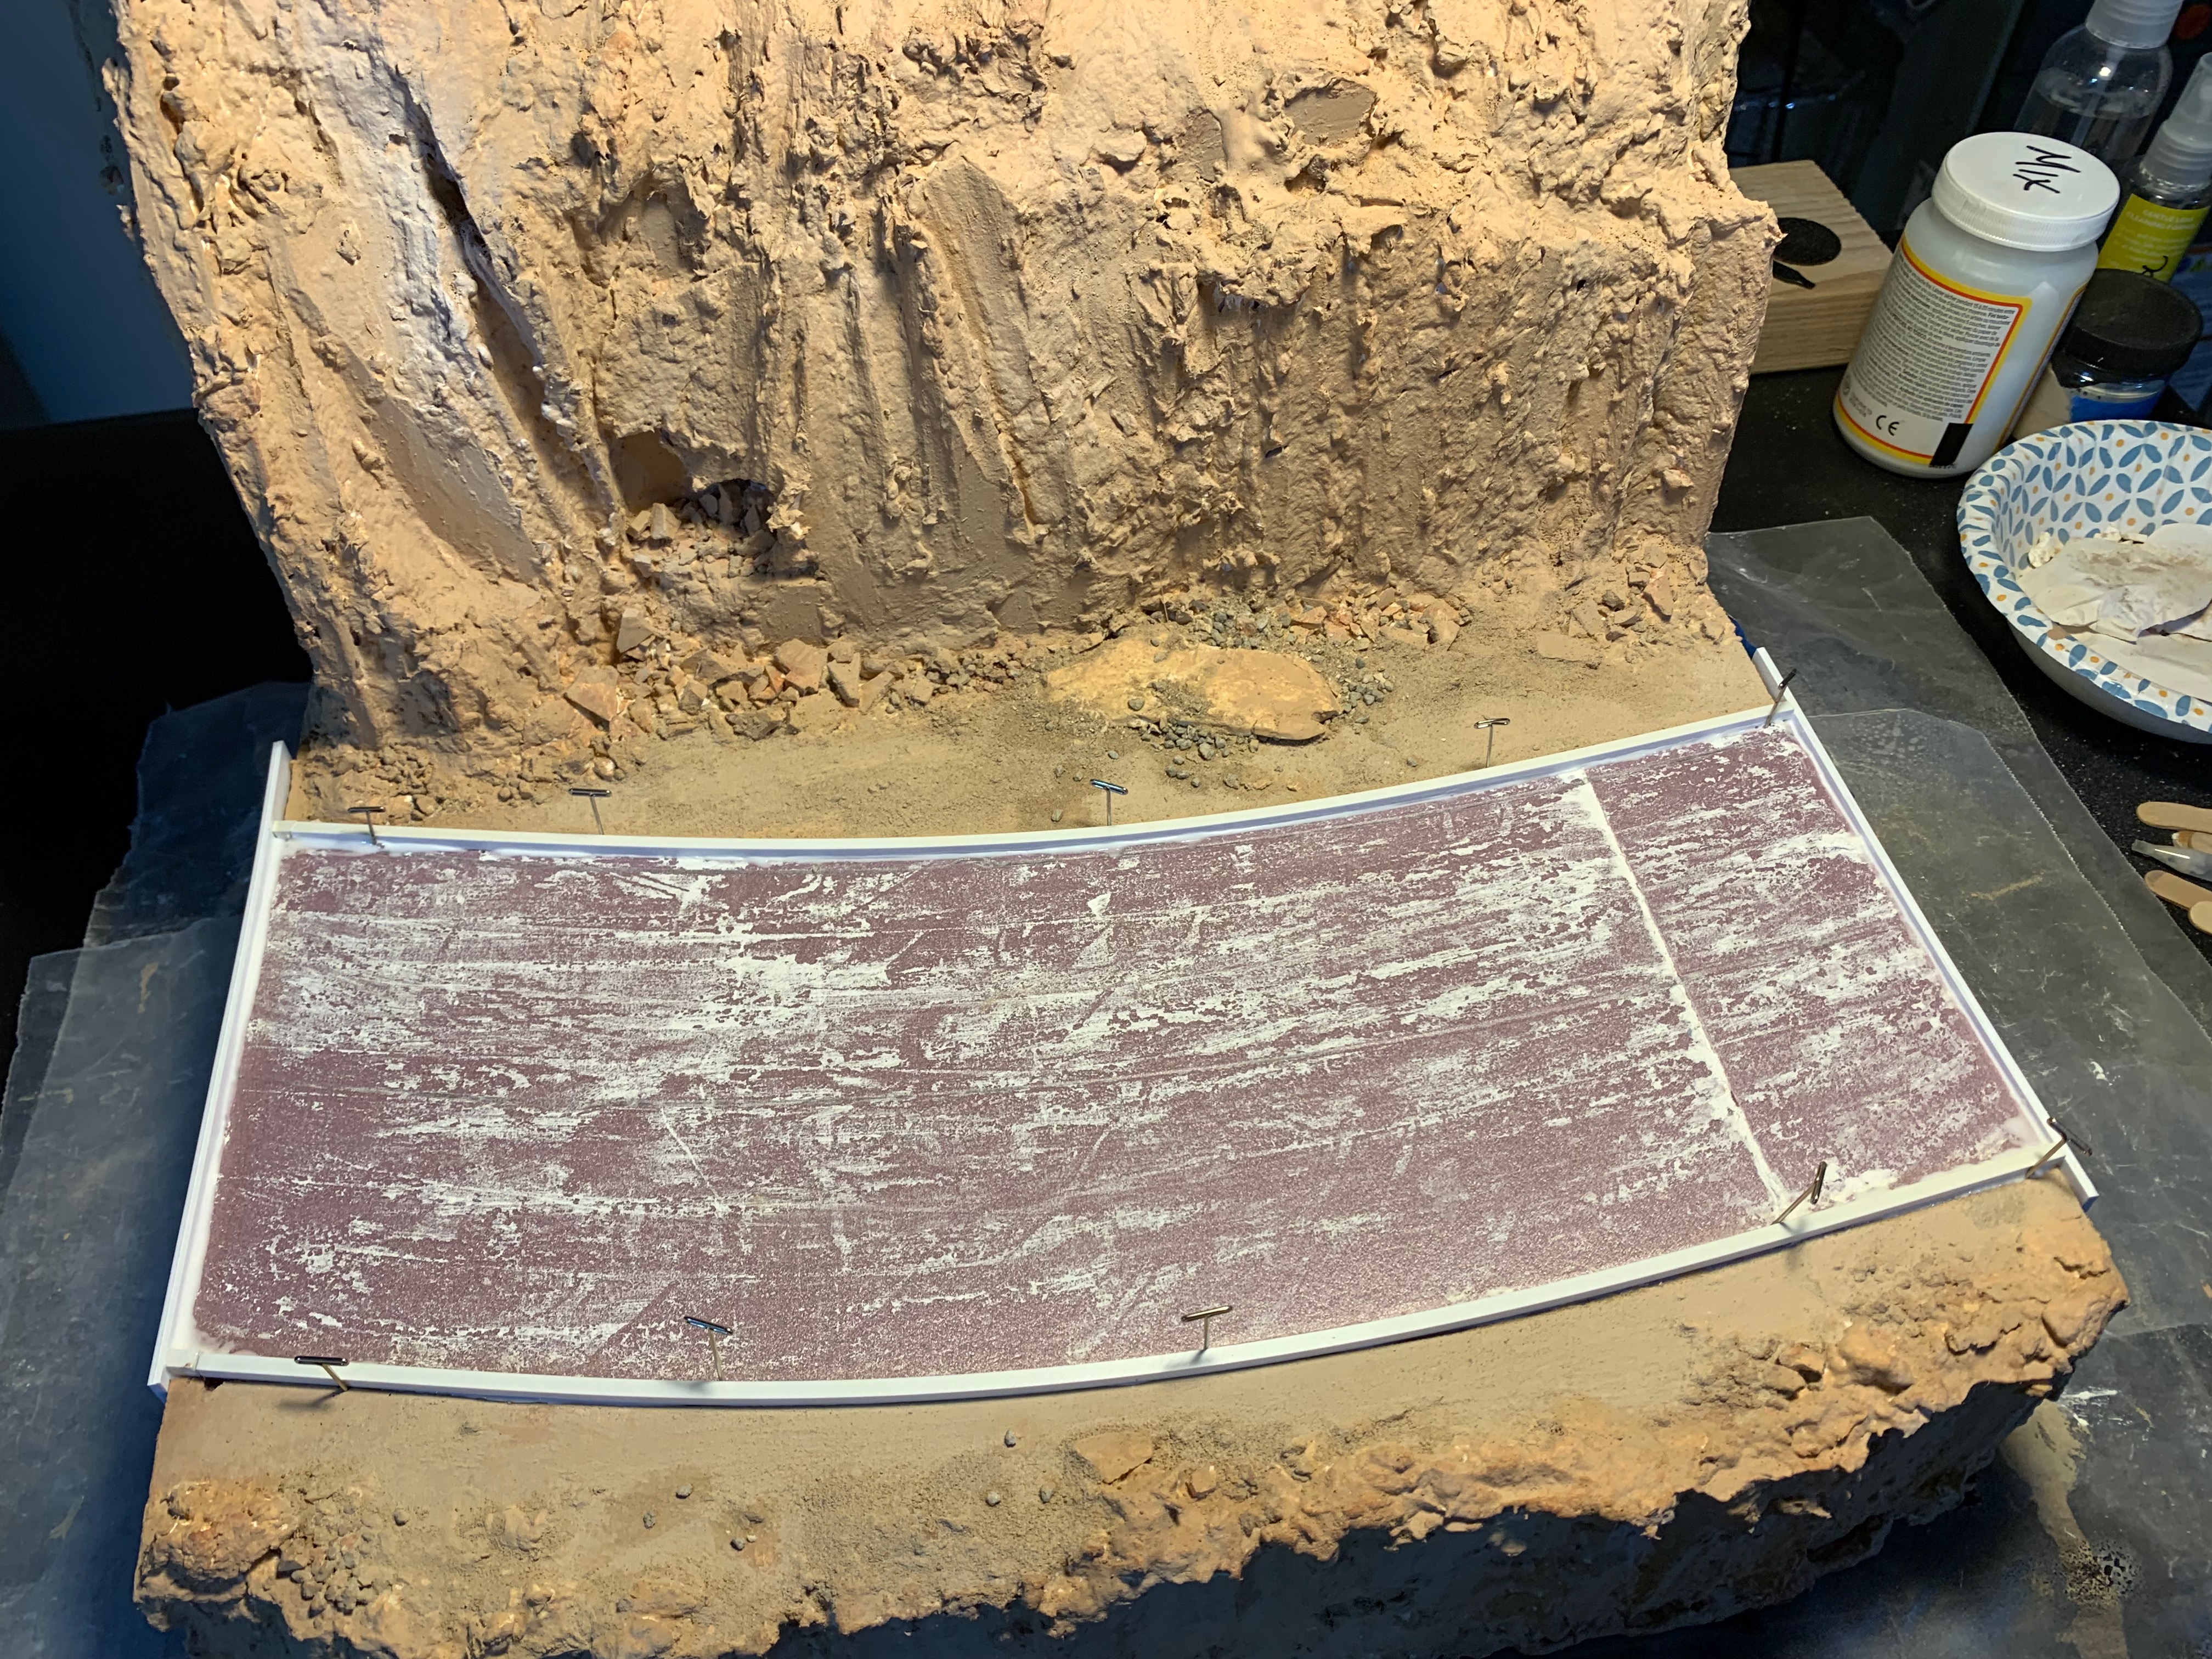
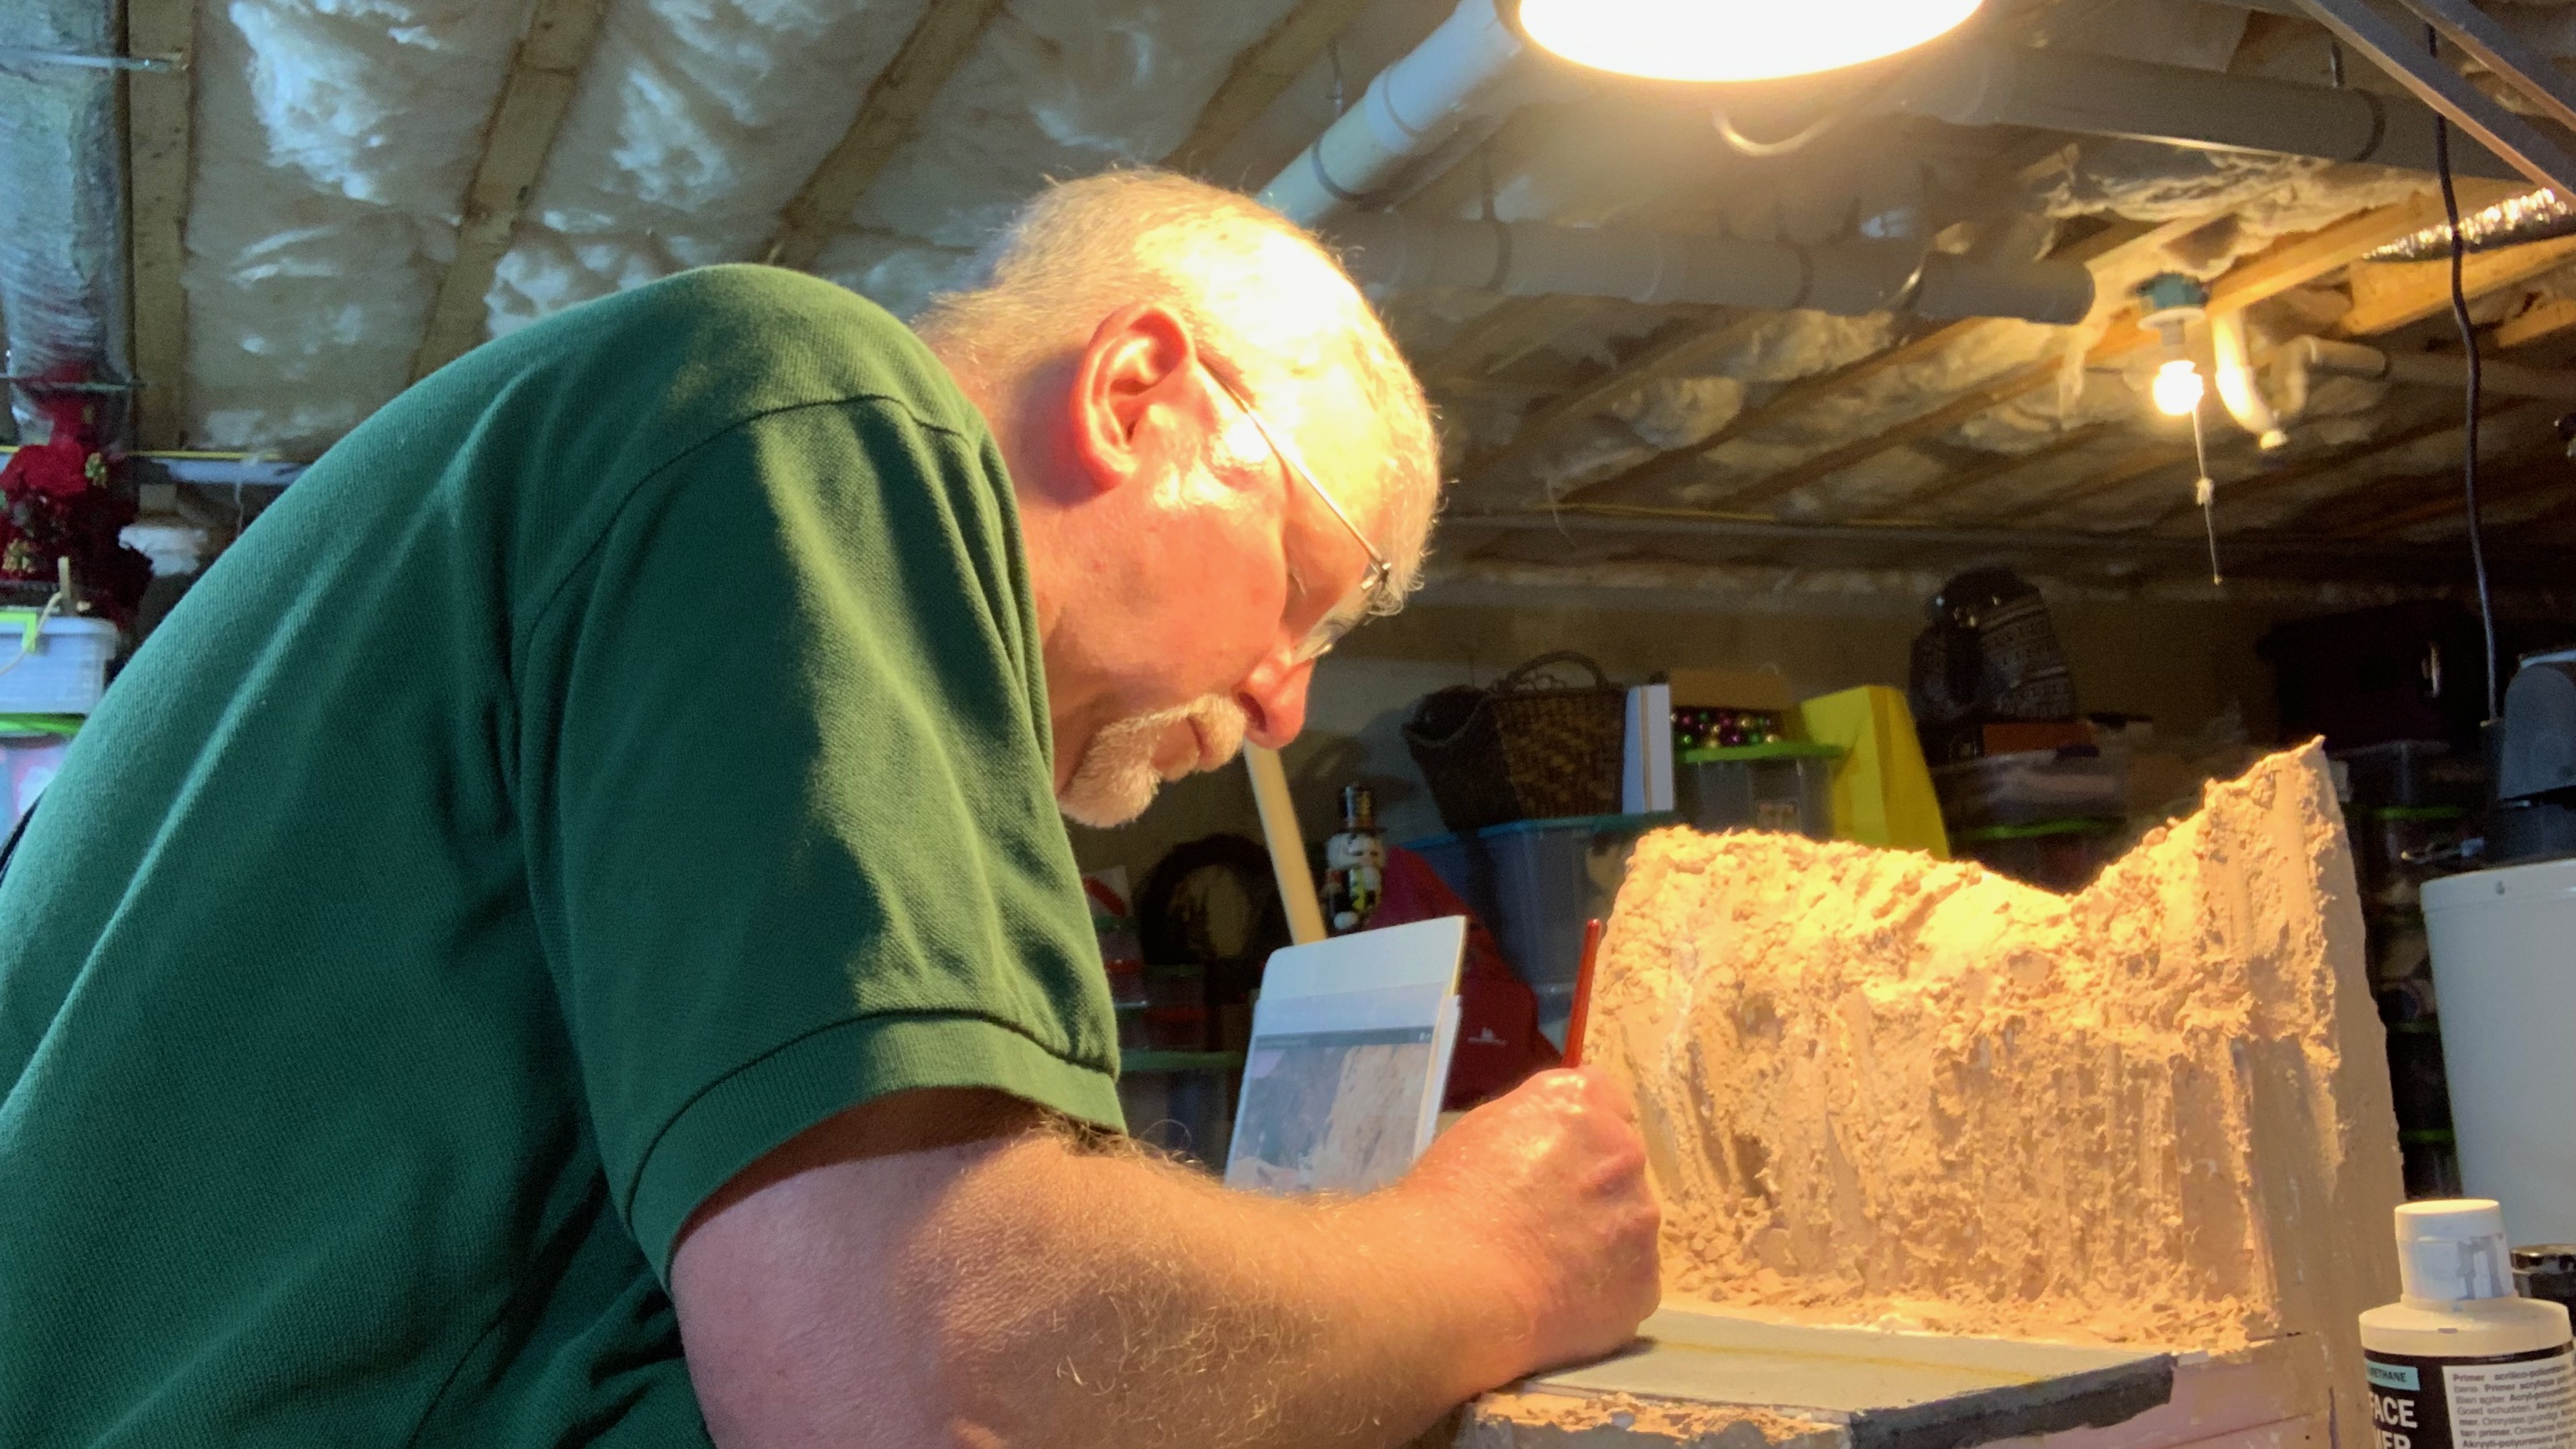
Foam board, wire cutter, glue, Sculpt-a-Mold, and other found things all came together to create a canyon scene where the road rides the rim of the canyon during the race. I used screen grabs and pictures to guide the texture, then took some other small liberties to bring the ravine to life.
It's what I call "thinking outside the base."
Without the cliff-edged road, there is no story about losing a tire and creatively thinking of ways to keep Herbie in the competition.
It's at the heart of the story.
Workshop Daze
I call it as I see it, and I see a real psychological condition I like to call "workshop daze."
When I was a kid, I really didn't understand the escape of model building. I knew it gave me time alone with my radio on and something to work on, but it was short-lived....like assembling, painting, and decaling all in a few hours on a Friday night.
Now, I can spend hours working on just one small part of a build. Same mindfulness, recognized, but less in a hurry.
This can be a good thing, though. It gives me the time to do something over, or to be a little bit better, or to obsess over something I think needs more time and consideration.
It also allows me time to get lost in the build.
Coining a New Term
For those of you who tell stories via your art, writing, model building, dioramas, railroads, etc., you have a new (and very clever and attractive) title:
Narrative Hobbyist
It's a very exclusive inclusive group of people who seek to entertain with their creations because we all know...
...there's a story.
Finishing Touches
Because of the 360-degree way I was thinking about things, I needed a way to place Herbie on the road with no strings attached. I finally came up with two small brass armatures that can be stuck in holes drilled in the road, bent to the correct angle, with one behind each of the grounded wheels. Even when you go behind the diorama, the armatures are hidden.
The usual weathering took place, along with some touch-up on the diorama.
AND THEN.....DISASTER!
Overly Dramatic?
Well, maybe.
For many hobbyists, we get to a point where we are nearly finished and yet there is something wrong. Sometimes it is so wrong that you don't want to share what you've done. Other times, the "error" is something you cannot quite put a finger on.
We've all been there. Almost every time we build something.
I see you.
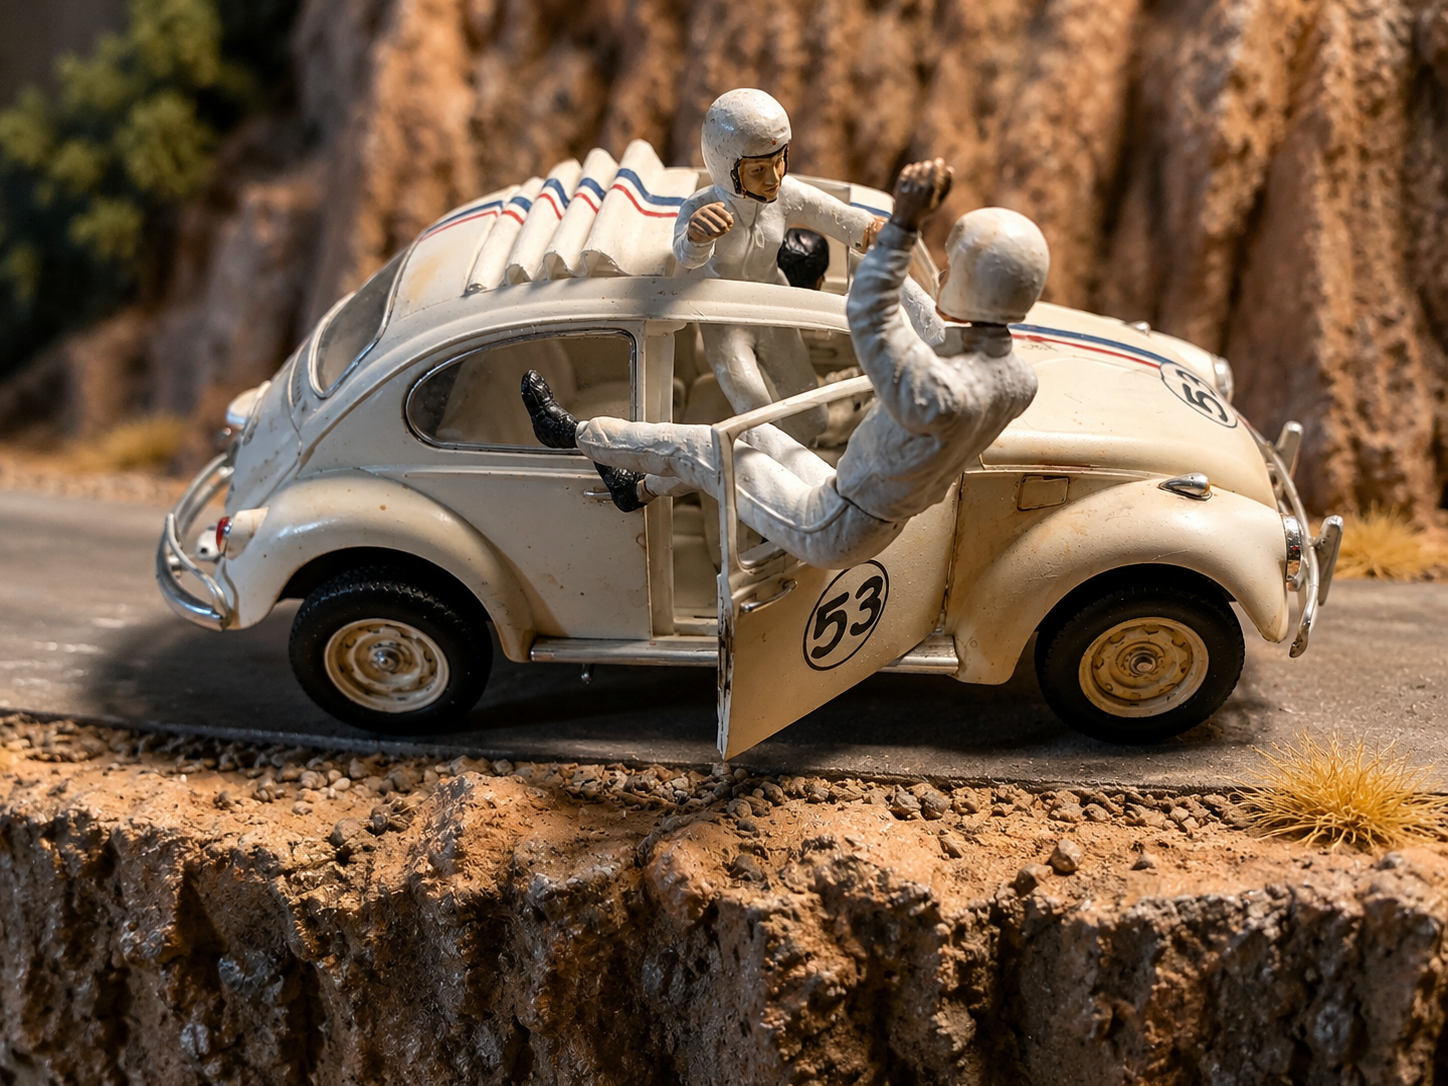
Jim was easy. He was driving, and that pose is something you and I replicate in real life every day. Gluing Carole and Tennessee to Herbie was a little nerve-racking. I'd spent quite a bit of time twisting and turning the figures before I applied super glue to the wiring to fix their poses. Now all I had to do was match that on the car once again (like any kid and a screen door, they were in-and-out-and-in-and-out).
Once I had them in place and put Herbie on his stand, it was very apparent to me that their coloring (and a couple of things on the diorama, like a rabbit watching the action) wasn't quite right.
The tone and shading were off....very off.
So I took some pics and walked away, unable to say that four-letter word we all love to say...
DONE.
Some sleep and a healthy dose of looking at the pictures allowed me to come up with a solution: pastels. I used a couple of different colors of ground-up pastels to even out the tone so that everything appears to be in the same "image."
Like a Polaroid, things came slowly into view (without the hand waving! IYKYK). Then I stepped back and could not wait to take it upstairs to show it off.
DONE.
The Ten-Year-Old Shows Up
Tell me time travel isn't true and I'll wink and nod knowingly...at your possible unknowing.
Ten-year-old me bubbled up from somewhere inside and saw, at the same time, the old glue-bombed kit I built so very long ago next to the newly finished Herbie I was holding in my hands. Like old Jedi appearing to new, I'd be lying if I said I didn't have a little something in my eyes.
One Friday night, while listening to what we now call "oldies," I built a car from start to finish because I loved that car, that concept, that humanization of things we (car guys will know for sure) call machines that are so much more.
I can remember looking at Herbie on my desk and thinking, "Wow, that's so cool," and reliving that feeling more than a year after new Herbie arrived on the bench.
Yes, I am preserving the old kit. Just holding it in my hands transports me back to simpler times.
But I am loving the Herbie I have now...just as much as ten-year-old me loved Herbie then.
DONE.
-ISH.
Postscript: Are There Things I'd Do Differently?
Striping. Moon roof canvas. A combination of those two. Better figures.
Not for anyone else viewing the diorama, but for me.
Editor's note: While researching this article, I found one on eBay and placed a bid. Because apparently this is how these things happen. I lost, but there will be others. C'est la vie!
Build Gallery